World Clock - automatic time zone conversion
prusaprinters
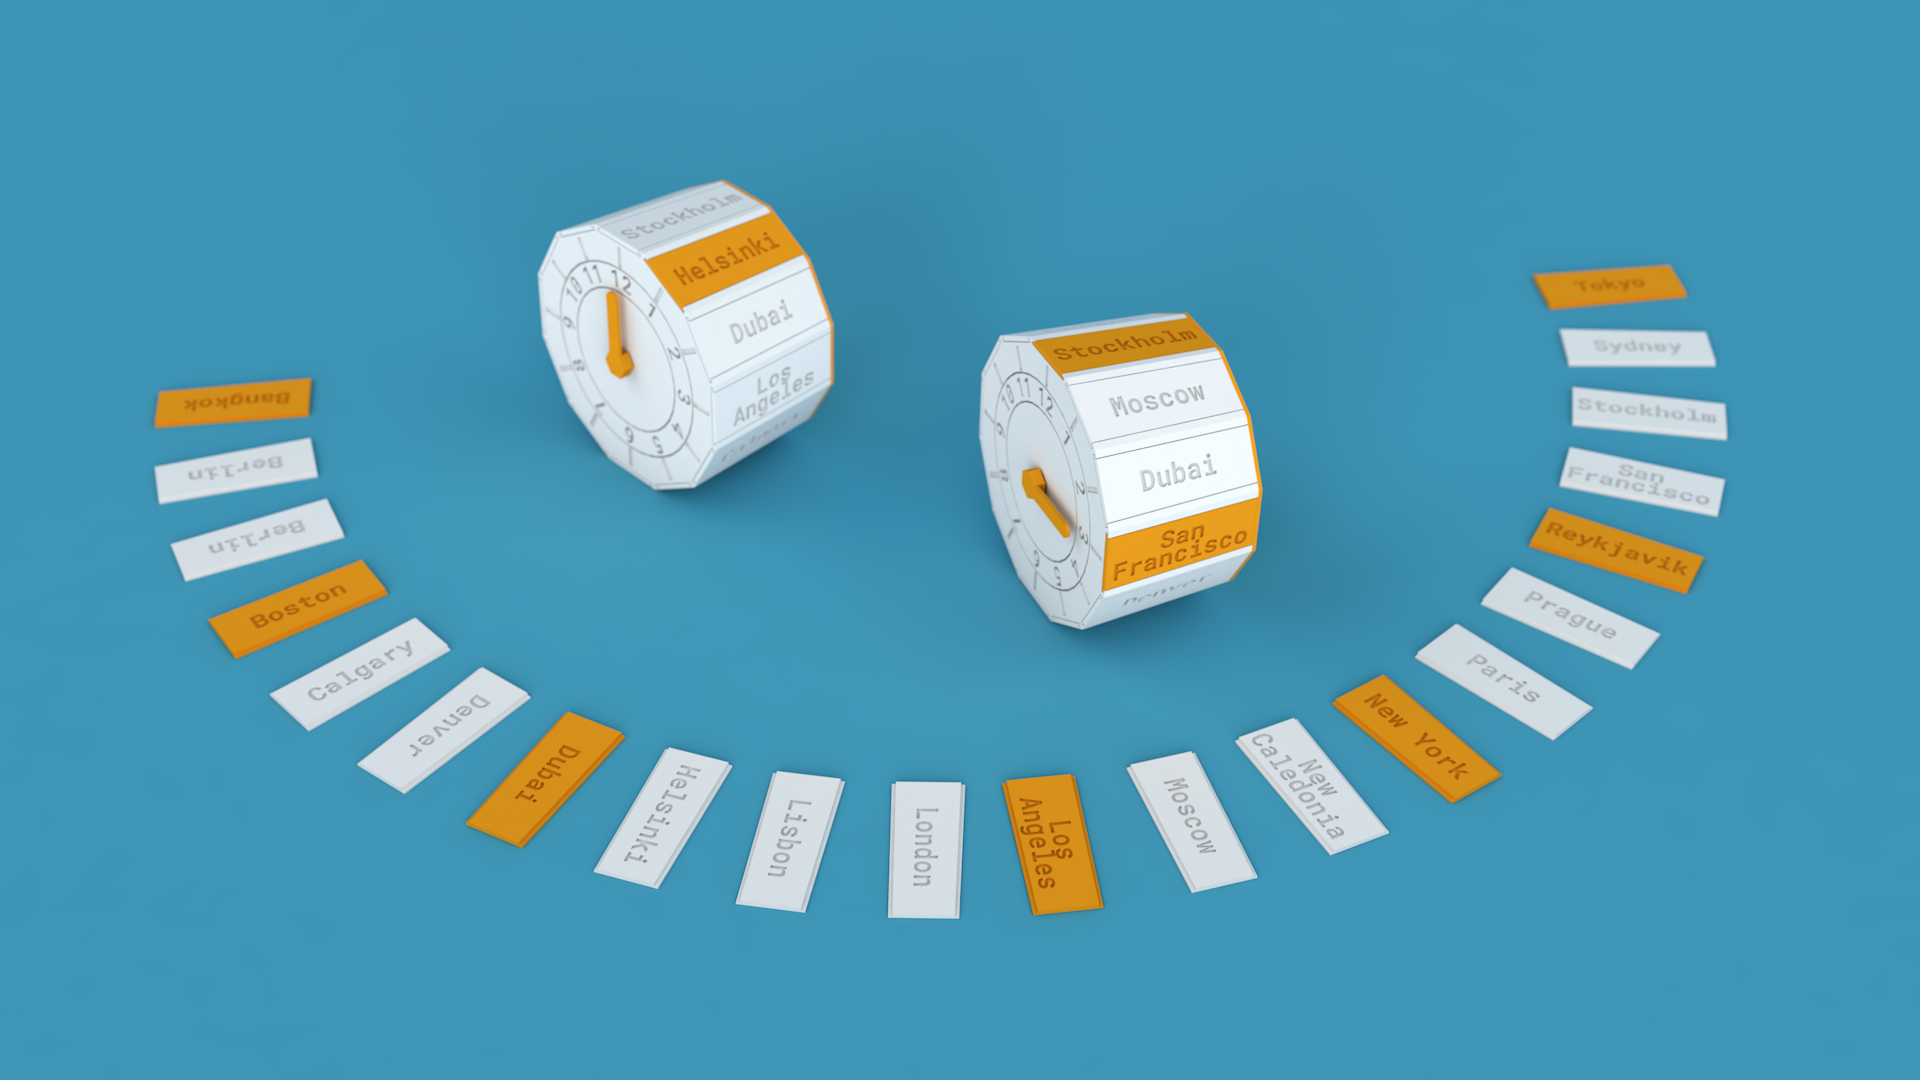
<p><strong>World Clock converts time zones by simply flipping it! </strong></p><p> </p><p>World Clock can help you keep track of time around the world. Don't get confused about your meeting time scheduled across the globe ever again! Quickly check what time it is for your family far away.</p><figure class="media"><oembed url="https://youtu.be/ovoUJ0xgwjY"></oembed></figure><p>This 3D model consists of several parts that combined with a 22mm bearing and a clockwork mechanism create a timekeeper which can easily display 12 different timezones. </p><p>World Clock has a flexible design allowing you to customize the city selection for the time zone conversion. Print 12 city plates in the correct time zones and slide them in the right positions. You can choose between the 21 most popular cities in 12 different time zones. All city plates have a UTC time standard embossed on the back for easy management. Choose a different filament color to highlight your favorite time zones! </p><p>You can also choose to print the “default cities” 3D file to get the 12 most popular cities in their given time zones.</p><p>Set the correct time on the watch face and flip the clock on any other side to see what time it is in that city. A bearing used inside will help the clockwork to align using gravity while the clock hand will show you the converted time. If you quickly want to change the default time zone, use the movable dial wheel and align the 12-hour mark with your favorite city. </p><p>The 3D model consists of:</p><ul><li>World Clock main body</li><li>Backplate</li><li>Bearing insert</li><li>Clock hand</li><li>21 different city plates which you can choose from</li></ul><p>Print all the .stl files in the default orientation. No support is needed! </p><p> </p><p>You will need to provide:</p><ul><li>22mm bearing</li><li>Clockwork mechanism, max 50x50mm with a 4mm hour shaft</li></ul><p>For assembly, simply insert the bearing insert into the bearing (it is designed to fit rather tightly) and place that inside of the clock's main body. Next, put the hour shaft of the clockwork mechanism into the bearing-insert assembly and attach the hour hand from the outside. Choose 12 different cities in the correct time zones and slide them into the right places. UTC markings will help you manage the time zones and a small notch on the back will hold the city plates in their position. Finally, close the clock with the backplate by pushing it inwards. </p><p> </p><p> </p><p> </p><p> </p><p> </p><p> </p><p> </p><p> </p>
With this file you will be able to print World Clock - automatic time zone conversion with your 3D printer. Click on the button and save the file on your computer to work, edit or customize your design. You can also find more 3D designs for printers on World Clock - automatic time zone conversion.