X Carve Acrylic Dust Boot
thingiverse
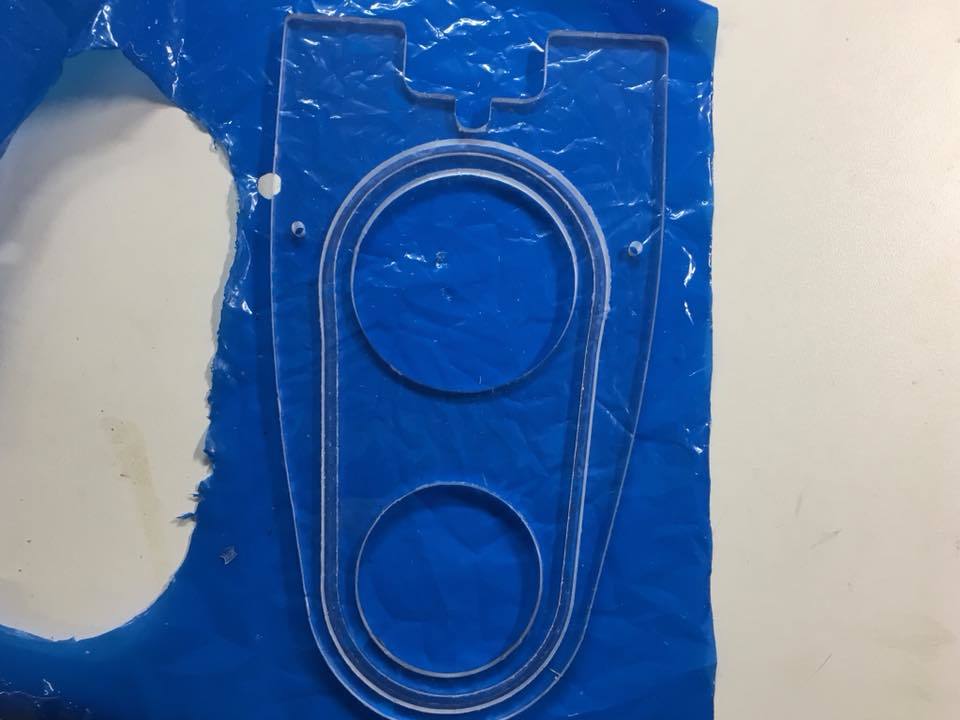
**DISCLAIMER ALERT** Don't use this STL file, I simply had to include one to upload this. DO NOT 3d print this, if you want to 3d print, use AK_Eric's files which are linked below. I'm not responsible for any broken bits, misscut pieces, etc, use and cut at your own risk. I took AK_Eric's dust shoe from his complete design and made it out of acrylic so I could see the working surface better. Firstly, I'd like to thank AK_Eric for designing the file, I simply modified it so it could be cut on my x-carve out of acrylic. Instructions are divided into Fusion 360 users and Easel users. This is designed to be used by 58mm (~2.25") vacuum tube with the Dewalt spindle. **Fusion 360 Users:** Obviously use the .f3d file and upload to your F360. The file should have the CAM settings already programmed for you. Flat tipped 1/8" single flute up cut bit is what this is programmed for. I have mine set to use 1/4" (6.15mm) cast acrylic. I used speed setting 5 on my dewalt router to cut this. You will have tabs on all of the through cuts to prevent ejection, just break the piece out and file to finish. Tabs are 1mm high to allow for inconsistencies in material height. I didn't add a facing pass because I didn't care enough to add one. Now that you have the model you can modify to your hearts desire, I am not a fusion 360 expert, so if you don't think the settings are right, go ahead and change them :). You will need the rest of AK_Eric's files to finish this which is linked below. **Easel Users:** Download the gcode file (.nc extension). This is setup for you to simply import into easel and get to cutting. To do so open a new Easel project, click import, select gcode, upload the file from wherever you saved it, and the preview will load. You will have 25mm of space on the x-axis and y-axis to place clamps. I suggest using a 1ft x 1ft 1/4" (6.15mm) thick piece of CAST acrylic. You must use 1/4" (6.15mm) cast acrylic for this to cut properly. Cutting time is ~24 minutes, so be prepared to stand at the machine with a vacuum to cut this. Once your file is uploaded, click carve and proceed through setting up the machine to carve like you normally would. After the cut is done you will pop the piece out of the acrylic and file the tabs to finish. Use a hot glue gun to glue in your bristles of choice. Download and print or have printed the rest of AK_Eric's files per his instructions to be able to install your new dust boot. Once again, I'd like to thank AK_Eric for making this awesome file. I simply modified it to make it perfect for cutting. This is for the xcarve dewalt spindle and a 58mm (2.25") vacuum tube. Download the rest of the files here: https://www.thingiverse.com/thing:2173106
With this file you will be able to print X Carve Acrylic Dust Boot with your 3D printer. Click on the button and save the file on your computer to work, edit or customize your design. You can also find more 3D designs for printers on X Carve Acrylic Dust Boot.