X-Carve Dust Shoe: Rev 2
thingiverse
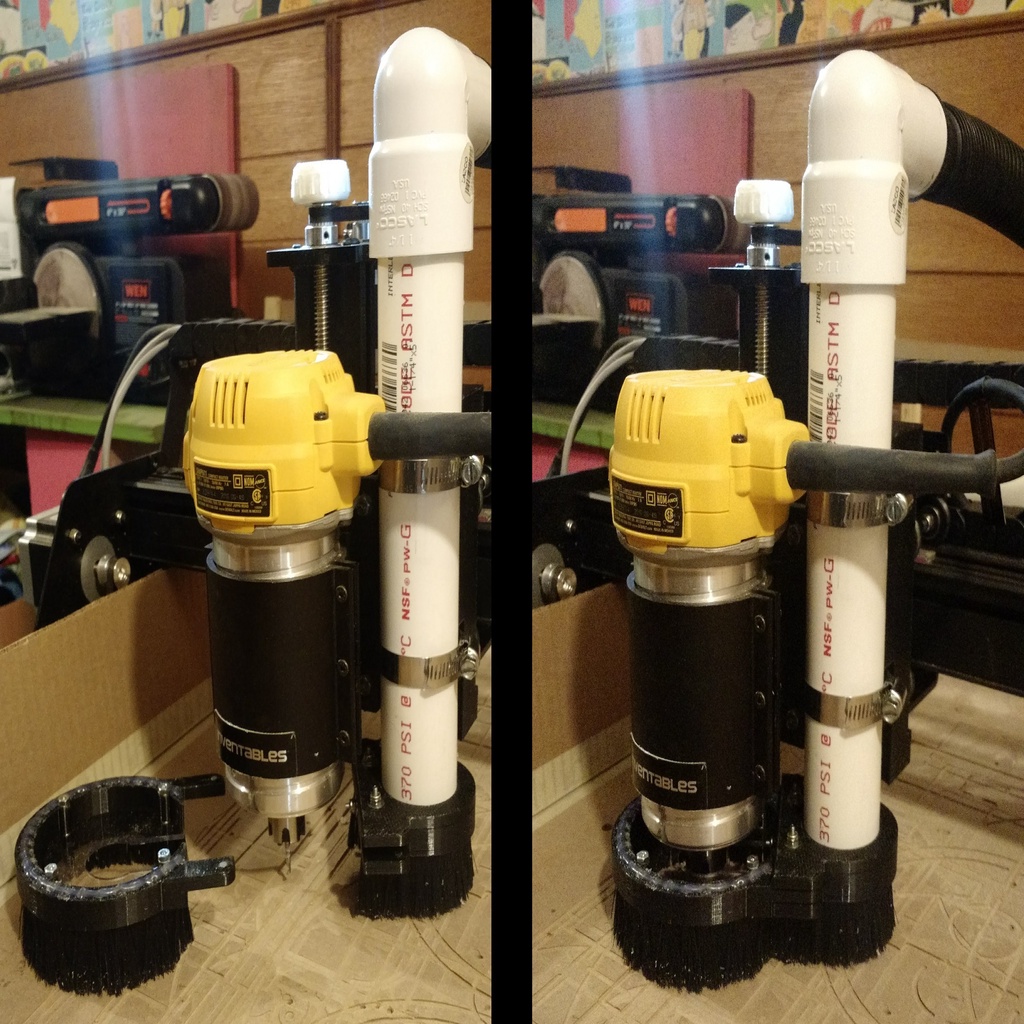
This is my second and final Dust Shoe. It's small and works awesome. I'm putting up these files to share, but be warned the instructions are going to be limited until I can get more time to add detail. The bristles were pulled from a brush I bought from Lowes similar to this one: https://www.lowes.com/pd/Quickie-Professional-9-in-Poly-Fiber-Deck-Brush/3036953 Any small dust brush you can pull the bristles out of should work Use the Xcarve_brush_guide.stl to cut the bristles to size with a sharp box cutter. This is a little tricky and time consuming. Using the guide insert bristles all the way into the round holes until brush end is below top of round hole surface. Use hot glue to fill the top of the round hole to keep bristles in place. You will also need 8x 4mm OD x 2mm High round neodymium magnets. Glue these into the holes in the sections that slide together. You need to make sure the magnets are oriented to attract each other or the brush may not stay attached. You will need some #4 hardware to attach the sections together. You will also need some #10 hardware for the set screws that hold the VAC_Attach to the X-Carve. Hopefully you can figure the rest out from the pictures. Check out the instructable I did for the first version. It may provide some guidance but Rev 2 has many changes: http://www.instructables.com/id/X-Carve-CNC-Router-Dust-CollectorShoe/ If you have question feel free to ask on the instructable's page and I will try to answer them. Good luck - it really is the BOMB!
With this file you will be able to print X-Carve Dust Shoe: Rev 2 with your 3D printer. Click on the button and save the file on your computer to work, edit or customize your design. You can also find more 3D designs for printers on X-Carve Dust Shoe: Rev 2.