X Leveler Rev 2 for Maker Select
prusaprinters
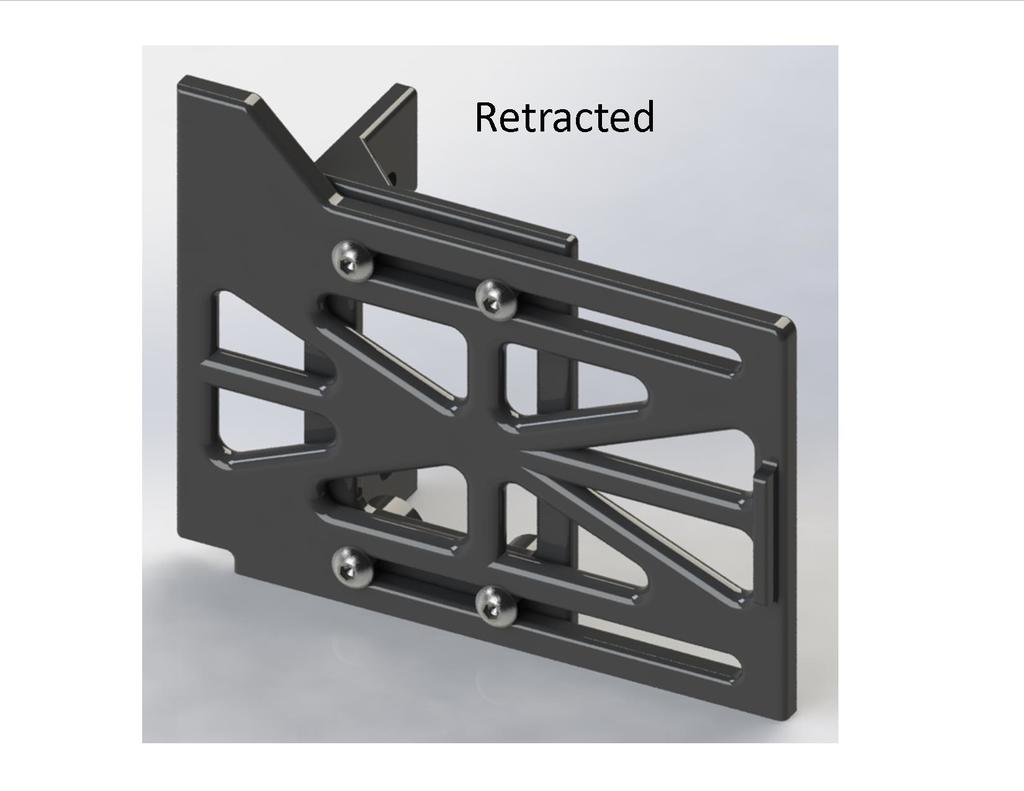
<p>Update: A Rev2 bracket is now included. It has a cutout versus a hole for the hardware, allowing you to slide the bracket on and off the frame, leaving the hardware in place. Easy On-Easy Off.</p> <p>Well, like any other tool, my original X-Leveling Spacers <a href="https://www.thingiverse.com/thing:3254069">https://www.thingiverse.com/thing:3254069</a> just seemed to get in the way on my print table after use.</p> <p>I didn't want to "put them away" after use, and didn't want to make some sort of tool storage thingy for them either.</p> <p>So, I did some thinking and came up with these.</p> <p>They do exactly the same thing as my originals, but they stay attached to the printer.</p> <p>Extend them in when you want to X-level, then retract them when you're done.</p> <p>They don't get in my way of anything, they're slimline, and based on whatever color you choose to print them in, they're quite a stylish addition to your machine.</p> <p>At least I think so. :-)</p> <p>Installing these will require that you drill and tap 4 ea 3mm holes in the front of your frame, 2 on each side.</p> <p>If you haven't got the necessary tools to do that, well, this might not be for you, OR, get what you need and make it happen. :-)</p> <p>You will also need to make sure that the Z motor mounting screws are toward the back of your machine to let the sliding part extend. That's the purpose of the notch in the bottom end.</p> <p>I've included STL, STEP and SLDPRT files.</p> <p>If you would be so kind, please post your Makes.</p> <p>Thank You!</p> <h3>Print Settings</h3> <p><strong>Printer:</strong></p> <p>Monoprice Maker Select V2</p> <p class="detail-setting rafts"><strong>Rafts: </strong> <div><p>No</p></div> <p><strong>Supports:</strong></p> <p>No</p> <p class="detail-setting resolution"><strong>Resolution: </strong> <div><p>.1mm</p></div> <p><strong>Infill:</strong></p> <p>35%</p> <p><strong>Filament:</strong></p> HatchBox PLA <p>Color is up to you</p> <p><br/> <p class="detail-setting notes"><strong>Notes: </strong></p> </p><div><p>I sliced these in Cura 3.6.0</p> Put the parts on the build plate according to the pictures. <p>The Brackets are identical,</p> <p>The Spacer needs to be copied/mirrored to obtain a Right and Left side.</p> <h3>Post-Printing</h3> <p><strong>Assembly/Installation</strong></p> <p>Tools Needed: a 2.5 mm drill bit, drill and a 3mm Tap and handle.</p> <p>Assemble the pieces for each side using the 3mm Nyloc Nuts and 3mm Button Head Screws.</p> <p>The Nyloc nuts should fit into the bosses by positioning them in the boss with the Nyloc out, then tapping them in with a small hammer.</p> <p>After assembly, the Spacer should be loose enough to easily slide back and forth, but not sloppily. I found that "sloppy" lets them vibrate during printing, making unwanted noise.</p> <p>The small tab/handle on the Spacer needs to be facing IN toward the Hot Bed on each side.</p> <p>After the Assembly is complete, extend the Spacer.</p> <p>Position the Assembly with the Spacer resting on the Z motor mount shell and just touching the vertical frame rail, with the Bracket flush against the frame.</p> <p>The holes in the Brackets are slightly elongated slots to allow for any inaccuracies during drilling, and allowing a slight bit of adjustment during installation.</p> <p>Mark where the holes need to be in the frame. It is easier if you mark, drill and tap the Top hole, then install a Capscrew/washer set to hold the Assembly in place while you mark the Bottom hole.</p> <p>Remove the Capscrew and Assembly, drill and tap the Bottom hole, then install the Assembly using both Capscrew/washer sets.</p> <p>Repeat for the other side.</p> </div></p></p> Category: 3D Printer Accessories
With this file you will be able to print X Leveler Rev 2 for Maker Select with your 3D printer. Click on the button and save the file on your computer to work, edit or customize your design. You can also find more 3D designs for printers on X Leveler Rev 2 for Maker Select.