XBox One Controller Wheel - Full Button Use
cults3d
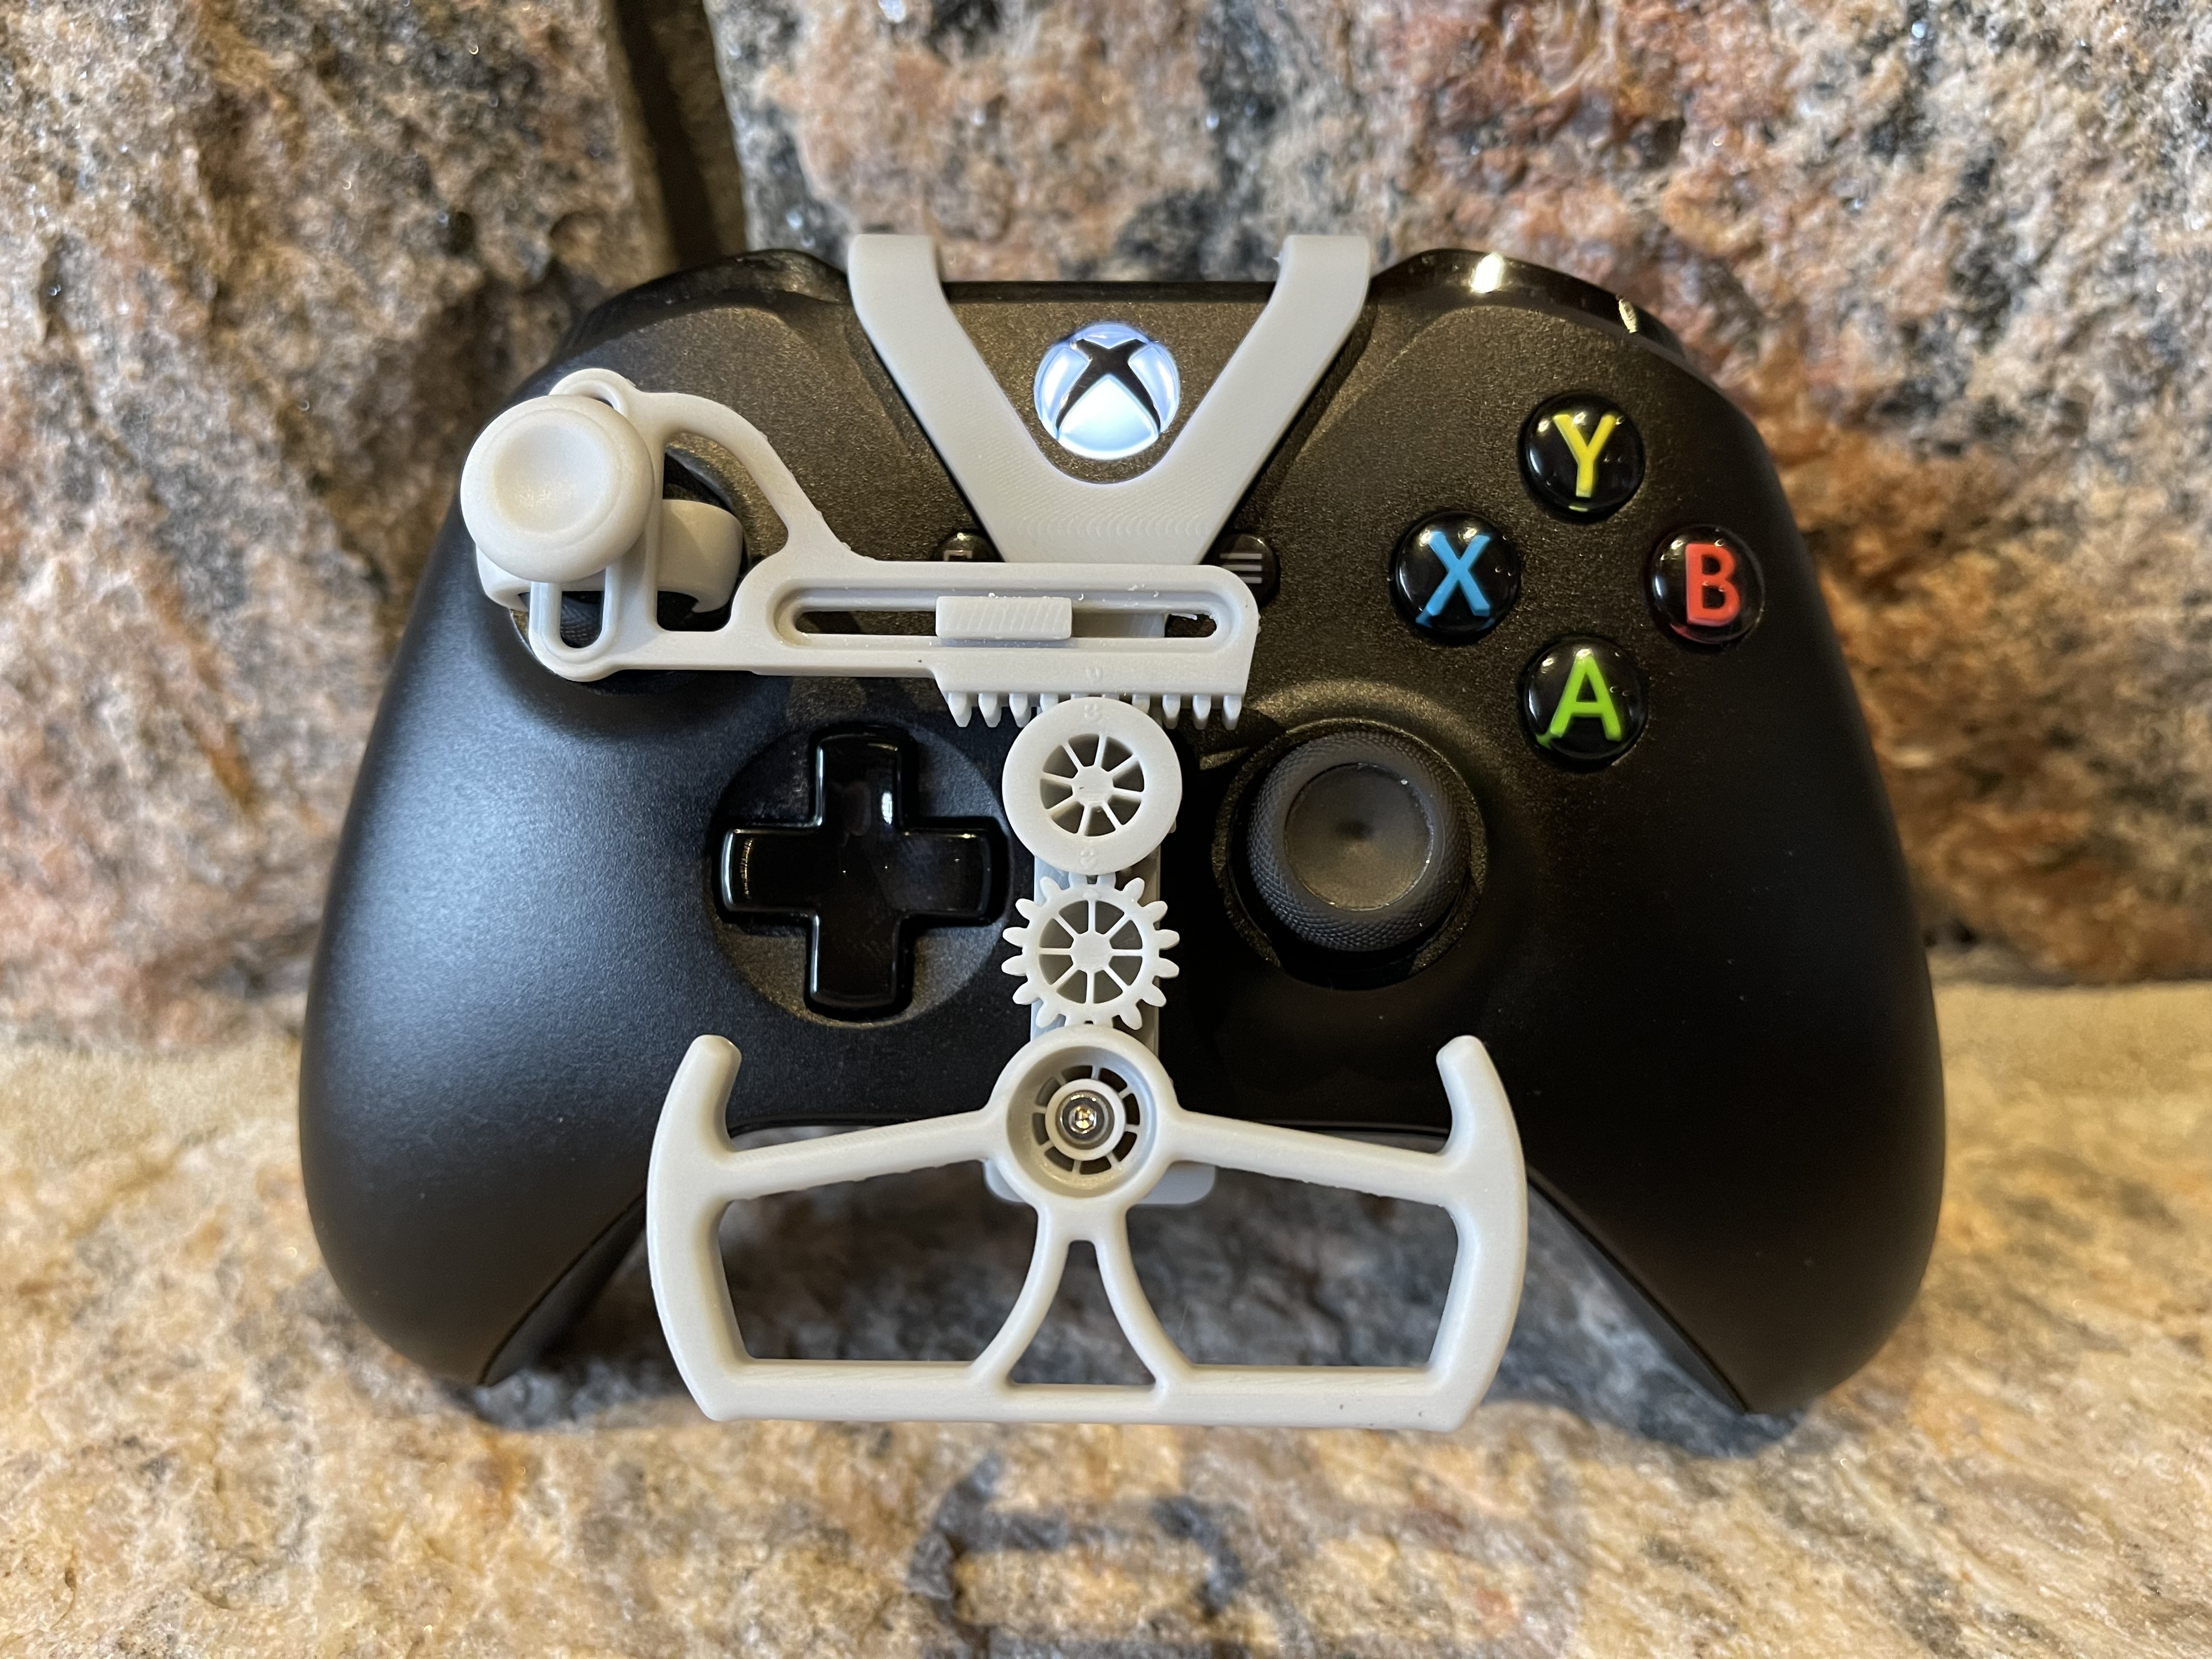
High-Clearance Xbox One Controller Wheel allows full use of the directional pad as well as the right side analog stick while the device is mounted. Left analog stick can move forward and backward allowing easier use for games requiring multiple control inputs. Two wheel options are available as well as a blank wheel hub to create your own custom version. Note: Wheel cannot be changed once mounted to the frame. Hardware: 1. 3x 623-2RS bearings 2. 1x M2x12 +M2 Nut (For High Clearance Wheel) 3. 1x M2x16 +M2 Nut (For Racing Wheel) Assembly: Prepare Gears: Flip the Pinion and Driven gear upside so the pins face up then press a bearing onto each gear pin. Now dab a small amount of super glue on the pin and center bore of bearing. Be careful not to get any glue on the bearing seals or inside the bearing itself, this can cause excess wear on the gear train. Installing Rack: Slip the rack over the slide on the frame, keeping the rack gear teeth on the right side. Installing Gears: Now that the rack is installed and the two gear sub-assemblies are bonded they can be installed on the frame. Starting with the Driven Gear (gear without flat top) add adhesive to center bearing recess on the frames vertical walls only. Try not to put adhesive on the base of bearing recesses as this can damage the lower bearing seal. IMPORTANT: When installing the Pinion Gear (gear with flat top) be sure to align the gear to top dead center. Small marks on the rack, pinion and driven gear will help you find center line. (Once glued this cannot be changed so it is vital that you follow this step closely.) Mounting Wheel: High-Clearance wheel requires (1x) m2x12 socket head cap screw and an m2 nut. Racing Wheel requires (1x) m2x16 socket head cap screw and an m2 nut. Press bearing onto wheel and mount using specified hardware (No glue until next step). Add thread locker or adhesive to keep nut from backing off. Now that the wheel is mounted to the bearing and freely spinning, refer back to Step 3 for installing bearings into the frame. IMPORTANT: This is the final alignment step, make sure the wheel is centered with the previously aligned gear train. Mount Joystick Extension: Take the Joystick Extension piece and slide into the rack on the left side. Secure by press-fitting Joystick Extension Pad on top. Mounting Assembled Mini-Wheel to Controller: Place the front of the mini-wheel frame over controller on the Xbox button side. Next slip controller joystick into Joystick Extension piece, then finally press down until the wheel side of the device clicks into the microphone slot below the directional pad. This high-clearance Xbox controller design was inspired by the original Xbox Controller Mini Wheel from Pixel2 (linked below). The 3D files associated with this design are not modified STL's from the original, and have been completely redesigned from scratch. (Link to original: https://www.thingiverse.com/thing:3049220)
With this file you will be able to print XBox One Controller Wheel - Full Button Use with your 3D printer. Click on the button and save the file on your computer to work, edit or customize your design. You can also find more 3D designs for printers on XBox One Controller Wheel - Full Button Use.