xConnect Panel Mount Flat
thingiverse
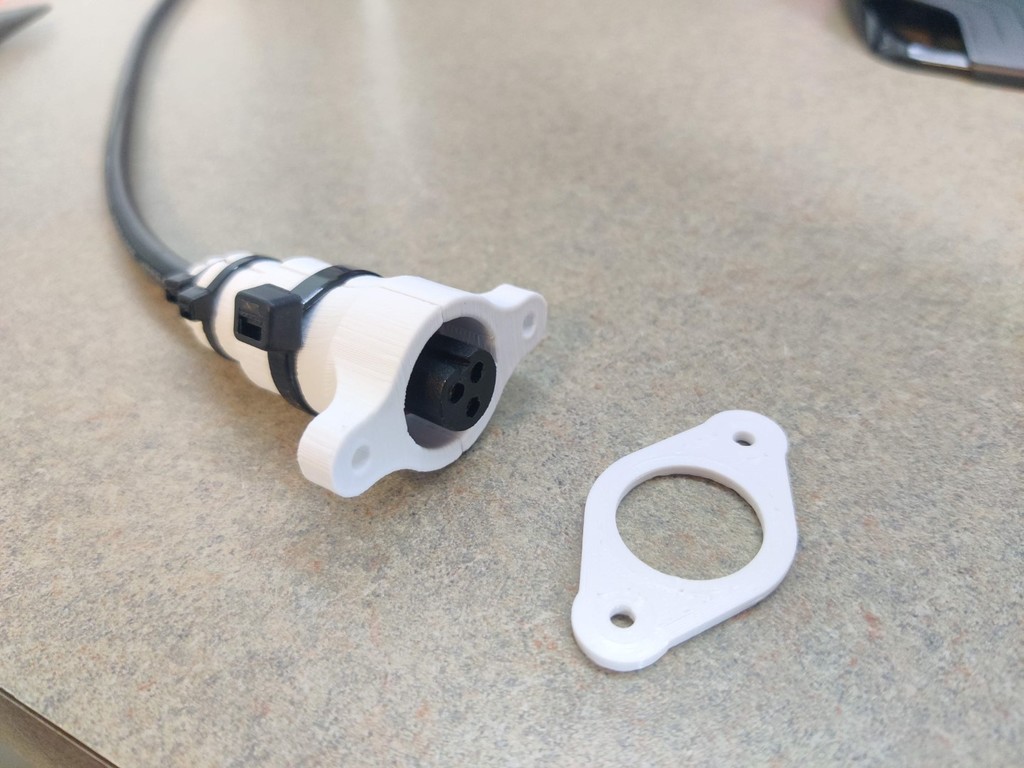
I made a mounting device for the popular 3-core xConnect connector. This connector is commonly used for advanced Christmas light displays to music using xLights or similar software. You can see this [Instructable](https://www.instructables.com/id/Holiday-Light-Show-Synced-to-Music/) I wrote about getting into that kind of show. The connector I modeled it on is from [Wired Watts](https://www.wiredwatts.com/3-core-xconnect-connector), but they should all be identical. No supports needed, print two of the mount piece obviously. I recommend printing at 0.2mm layer height. #Hardware Needed# - M3 bolts (x2) - M3 hex nuts (x2) - Washer for M3 bolts (x2) (optional) - Normal sized zip-tie (x2) - Small zip tie (x1) (optional) #Assembly# Put the female end of the xConnect pigtail in between the two halves of the part, paying attention to the flat areas so that your connector is vertical. Press them together with your fingers, and attach zip ties as shown in the picture in the channels for them. If the hex nuts will friction fit in you can press them in now, if they're loose just wait a step. Next, drill appropriate holes in your enclosure to mount the connector. Put a M3 bolt with washer on it through the front cover, through the enclosure, through the mount and into the hex nut (attach hex nut here if you haven't already). Tighten it up nicely and you're done!
With this file you will be able to print xConnect Panel Mount Flat with your 3D printer. Click on the button and save the file on your computer to work, edit or customize your design. You can also find more 3D designs for printers on xConnect Panel Mount Flat.