Xiaomi Aqara Opple Switch Cover
prusaprinters
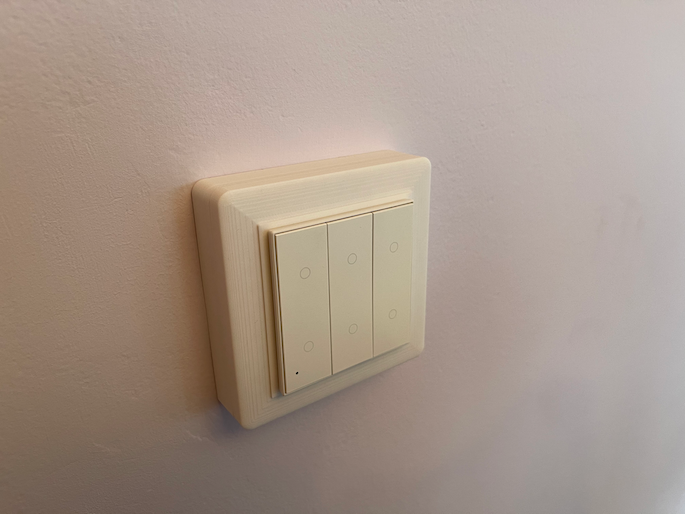
<p>v2 update - I found the sticky tape lost its hold over time, so I've included four small holes for 8x3mm Neodymium magnets to hold the top cover onto the bottom cover. I used super glue to hold the magnets in place, letting them dry whilst the two covers were lined up together (top cover on the desk with the exposed holes, bottom cover on top of that). Only two magnets in opposite corners are needed, but I included 4 holes for choice.</p> <p>Magnets: <a href="https://www.amazon.co.uk/gp/product/B08BJQM2K4?tag=thingiverse09-20">https://www.amazon.co.uk/gp/product/B08BJQM2K4</a></p> <p>I have created a UK wall light switch cover for the Xiaomi Aqara Opple switch.</p> <p>It has been designed to allow the Opple switch to be positioned either vertically or horizontally (I prefer vertical as seen in the pictures).</p> <p>The switch itself is magnetically held in place (using magnets from original wall cover the unit ships with). You can easily remove the Opple switch to access the main light switch behind it.</p> <p>The bottom cover goes over the existing wall switch (up to 87mm width/height). You secure it in place with either the existing screws or some longer ones if needed. I've purposely allowed some clearance between the bottom cover and the wall switch to cater for different thicknesses. If you find there is a gap, just wedge something between the bottom cover and wall switch to push the switch against the wall. It should have enough room for a double wall switch too (I don't have any to test).</p> <p>The top cover is attached to the bottom cover using strong double sided sticky tape (see photo). This allows for a neat finish with no visible screws.</p> <p>The magnets need to be removed from the Opple switch wall mount by peeling off one of the rubber strips on the back and using a knife to cut them out (see photo). You then need to superglue these on to the recessed areas on the top cover and allow them to fully dry before attaching the switch (those magnets are strong!).</p> <p>This is also compatible with the single and double Opple switches. They can be bought from places like Aliexpress for around £14: <a href="https://www.aliexpress.com/item/1005001614677136.html">https://www.aliexpress.com/item/1005001614677136.html</a></p> <p>No supports are required when printing the top and bottom covers, just make sure the bottom cover prints with the flat part facing down. You can print in 0.2 or higher, though the top cover benefits from 0.12 for a more detailed slope.</p> <h3> Print Settings</h3> <p><strong>Printer Brand:</strong></p> <p>Creality</p> <p class="detail-setting printer"><strong>Printer: </strong> <div><p>CR-10</p></div>**Rafts:** Doesn't Matter <p class="detail-setting supports"><strong>Supports: </strong> <div><p>No</p></div>**Resolution:** 0.12 <p class="detail-setting infill"><strong>Infill: </strong> <div><p>20%</p></div> **Filament:** [ Eyrone PLA ](http://www.amazon.com/s?url=search-alias&field-keywords=Eyrone+PLA&tag=thingiverse09-20) White <br/> <p class="detail-setting notes"><strong>Notes: </strong> </p><div><p>Printed on a Creality CR-6 SE</p></div> Post-Printing ============= Due to the first layer slightly spreading on the print bed, you may need to sand down the lip to give a smooth finish so that there's no ridge when joining the top and bottom covers. How I Designed This =================== Fusion 360 and lots of little sample tests to get the recess for the switch just the right size! <p class="detail-image"><img src="https://cdn.thingiverse.com/assets/d1/b6/ce/ea/30/AqaraOppleSwitchTests\_-\_1.png"/></p></p></p></p> Category: Gadgets
With this file you will be able to print Xiaomi Aqara Opple Switch Cover with your 3D printer. Click on the button and save the file on your computer to work, edit or customize your design. You can also find more 3D designs for printers on Xiaomi Aqara Opple Switch Cover.