Xiaomi Wall Switch double : adaptateur FR : volets roulants
thingiverse
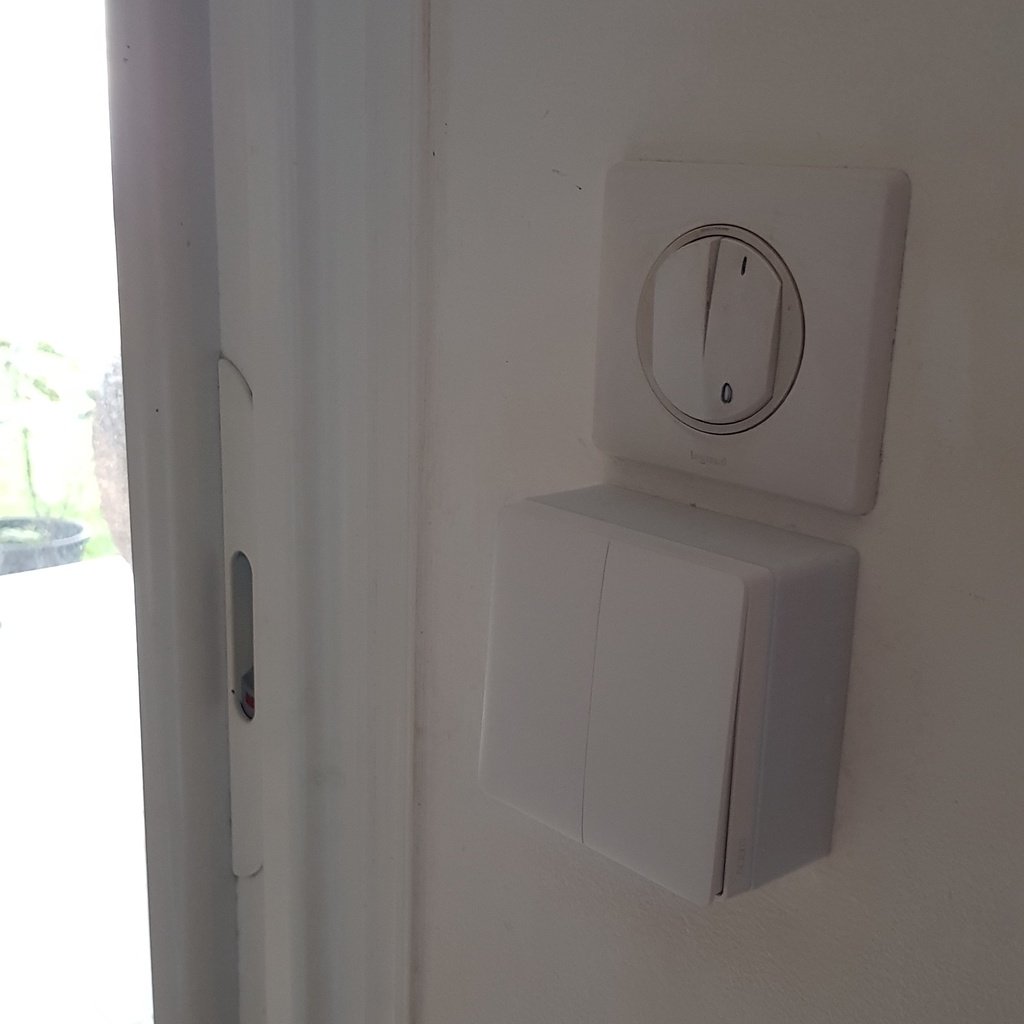
Un adaptateur pour les inter Xiaomi sans neutre, 2 phases. /////////////////////////////////////////////////// UPDATE : inverseur///////////////////////////////////////// J'utilise ce switch double 2 phases sans neutre pour un volet roulant : j'ai fabriqué un inverseur avec 2 relais 220V 8A afin que, même si les 2 poussoirs sont activés, aucune des 2 phases ne soient envoyées au moteur et surtout pas simultanément! ;) relais : https://www.ebay.fr/itm/Rel%C3%A8-relay-230V-220V-8A-circuito-stampato-pcb-2-contatti-c-o-in-scambio-RT424730/221884524443?ssPageName=STRK%3AMEBIDX%3AIT&_trksid=p2060353.m2749.l2649 Avec cette sécurité, même si les 2 poussoir Xiaomi sont activés manuellement ou par une automatisation, le moteur ne cramera pas car les 2 phases n'arriveront pas au moteur ;) Dans mes automatisation, avant de commander la montée du volet sur le switch gauche, je fais une automatisation pour eteindre le switch droit, et inversement, avant de lancer une automatisation pour commander la descente du volet sur le switch droit, je fais une automatisation pour eteindre le switch gauche, ainsi je suis sur que ma montée automatique du volet le matin va se faire et la descente automatique le soir également car si les 2 switch sont commandés, rien ne se passe, but de l'inverseur. Ceci dans le but de palier à tout appuie accidentel en journée ou si les enfants jouent avec. Xiaomi n'a pas encore prévu ca dans leur scénario, il faut pas oublier que c'est avant tout pour gérer 2 ampoules lol... Mais un volet roulant ne consomme que très peu et ces switch sont capable de gérer jusqu' à 2500W au total, disons 1250W par switch...ca laisse de la marge, le mien consomme 250W maximum au démarrage... Faites bien vos soudures et ca ne craind rien du tout...si vous êtes frileux, prenez une plaque troué de montage pour souder vos relais et intégrez les ou vous avez plus de place (coffre de volet, boite de dérivation, ...) moi je préfère les avoir derrière l'interupteur, c'est en intérieur et bien protégé! A vous de voir. Si vous avez des améliorations à apporter, je serais ravi de découvrir cela, @+ ///////////////////////////////////////////////////////////////////////////////////////////////////////////////////////////////////////// Ces inter ont une base d'encastrement carrée et ca rentre pas dans nos pots standards ronds de 60mm...lol Donc ca met l'inter en applique, mais c'est acceptable (pour moi) niveau rendu final. https://www.ebay.fr/itm/Xiaomi-Aqara-Feu-Zero-Ligne-sans-Fil-Interrupteur-Lumi%C3%A8re-Contr%C3%B4le-Double-Clef/232978141211?ssPageName=STRK%3AMEBIDX%3AIT&var=532496359495&_trksid=p2057872.m2749.l2649 Instructions : 1-déclipser le cache des 2 bouton de l'appareillage Xiaomi. 2-passer les 3 fils : phase arrivée et 2 phases retours dans le cache 3d print et raccorder l'appareillage Xiaomi. 3-Mettre l'appareillage dans le socle 3d print (les 2 ergos à l'horizontal pour que ca coincide avec les trous du pot de centre encastré dans votre mur). 4-Fixer l'ensemble avec 2 vis à placo de 45 ou 55mm de longueur. 5-Reclipser le cache des boutons sur l'appareillage. //////////////////////////////////////////////////////// EN ///////////////////////////////////////////////////////////////////// An adapter for inter Xiaomi without neutral, 2 lines. /////////////////////////////////////////////////// UPDATE : inverter///////////////////////////////////////// I use this switch 2-phase without neutral for a roller shutter: I made an inverter with 2 relays 220V 8A so that, even if the two pushers are activated, none of the 2 phases are engineered and especially not simultaneously ! ;) relais : https://www.ebay.fr/itm/Rel%C3%A8-relay-230V-220V-8A-circuito-stampato-pcb-2-contatti-c-o-in-scambio-RT424730/221884524443?ssPageName=STRK%3AMEBIDX%3AIT&_trksid=p2060353.m2749.l2649 With this security, even if both Xiaomi pushbuttons are activated manually or by automation, the engine will not burn because the two phases will not reach the engine;) In my automation, before controlling the rise of the shutter on the left switch, I make an automation to turn off the right switch, and vice versa, before launching an automation to control the descent of the shutter on the right switch, I make an automation for turn off the switch left, so I'm sure that my automatic rise of the shutter in the morning will be done and the automatic descent at night also because if the 2 switch are ordered, nothing happens, purpose of the inverter. This in order to overcome any accidental support during the day or if children play with it. Xiaomi has not yet planned this in their scenario, we must not forget that it is primarily to manage 2 ampoules lol ... But a shutter consumes very little and these switches are capable of managing up to 2500W in total, say 1250W per switch ... it leaves the margin, mine consumes 250W maximum at startup ... Make your welds well and it does not fear at all ... if you are chilly, take a hole plate mounting to weld your relays and integrate or you have more space (shutter box, junction box, ... ) I prefer to have them behind the switch, it is inside and well protected! Up to you. If you have any improvements to make, I'd be delighted to discover that, @ + //////////////////////////////////////////////////////////////////////////////////////////////////////////////////////////////////////////// These inter have a square mounting base and it does not fit in our standard 60mm round pots ... lol So it puts the inter applies, but it is acceptable (for me) level final rendering. Instructions : 1-unclip the cover of the 2 buttons of the Xiaomi switchgear. 2-pass the 3 wires: phase arrival and 2 phases returns in the 3d print cache and connect the Xiaomi switchgear. 3-Put the apparatus in the base 3d print (the 2 ergos in the horizontal so that it coincides with the holes of the center pot embedded in your wall). 4-Fix the assembly with 2 screws to plaster of 45 or 55mm length. 5-Reclose the button cover on the switchgear.
With this file you will be able to print Xiaomi Wall Switch double : adaptateur FR : volets roulants with your 3D printer. Click on the button and save the file on your computer to work, edit or customize your design. You can also find more 3D designs for printers on Xiaomi Wall Switch double : adaptateur FR : volets roulants .