XRAD'S NAT GEO GEODE NEOPIXEL RING DISPLAY
thingiverse
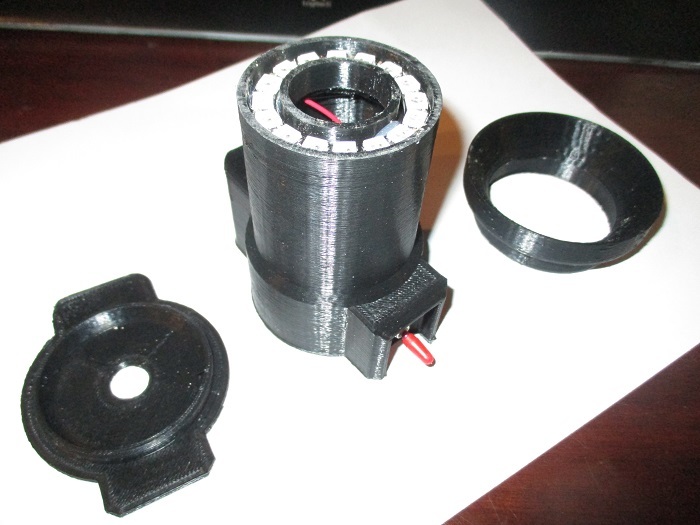
Crystal display video: https://www.youtube.com/watch?v=L9jGMS4tYkY&feature=youtu.be Kids love the Nat Geo Break Open Geode kit, which offers great fun and excitement. You can break them open with a hammer or use a small tile wet saw to create sweet sopressata. For me, half the fun is figuring out what to do with a cool split-open geode. I know! Add some neopixel lighting for an awesome display. But it needs to be more than just any blinky code - it has to be a cool blended light show. You can put anything relatively transparent on top of this, and it doesn't have to be a geode. https://www.amazon.com/NATIONAL-GEOGRAPHIC-Break-Geodes-QUALITY/dp/B0160JB7IS Easy 3D print. There's also some basic wiring and programming for this project. You can get the code here: https://forums.adafruit.com/viewtopic.php?f=52&t=145467&p=718727#p718727. See more details, including Fritzing basics, here: https://forums.adafruit.com/viewtopic.php?f=52&t=145467&p=718604#p718604. Here are the required parts: * 1 x 1 amp USB charger (TP 4056 works fine, and case designed for this charger) - https://www.ebay.com/i/292304666057?chn=ps * 1 x 350-1000mAh lipo 1S battery (3.7v) (I use Tenergy 380mAh lipo 3.7v) * 1 x on/off switch - https://www.ebay.com/itm/SPST-TOGGLE-SWITCH-CAR-12V-ON-OFF-AUTOMOTIVE-SWITCH-AUTOMOTIVE-RC-HOBBY-10-Pc/161265644662?hash=item258c2e7476:g:o8AAAOSw3lFZd7uk:rk:1:pf:0 * 1 x Adafruit Trinket 5v 8mHz 8k flash (6.95$! https://www.adafruit.com/product/1501) * 1 x 16 neopixel ring - https://www.adafruit.com/product/1463 Here are the 3D parts: First, we need to make the 3d print Neopixel display stand which is made from three parts: base, ring holder, and diffuser. Print and test fit the three parts. Get them cleaned up and paint if you like. Wiring: Solder red and black leads for the USB charger (26g is fine). Insert USB into mount slot and test fit usb charger cord. Don't hot glue anything until you test your circuit! Solder two 4 inch leads to the switch and mount switch in hole. Solder two 4" leads to the Trinket using Batt and Gnd. Solder three 6 inch leads to neopixel ring; I like red +, brown -, and GREEN for the signal lead (represented in the fritzing image). Note: Wiring is not to the specific fritzing location for the ring! Look at the ring for SIGNAL IN, +, and GND for proper connections. GREEN goes to signal IN. + and GND locations as labeled on ring. Pass the neopix wires through the correct holes (or drill your own if needed), and test fit in housing. Otherwise, wire up as per the Fritzing diagram. Programming: USB connect the Trinket 5V unit to your computer. You will need the Arduino IDE and some Adafruit libraries to do the programming (simple to do). Go to Adafruit site and learn about basic programming of the Trinket: https://learn.adafruit.com/introducing-trinket Final assembly: Test the circuit before final assembly. You should see a nice neopixel show as in the youtube vid. Then hot glue USB charger from inside (make sure the LEDs are facing through the window!), and a few small dabs of hot glue to hold the neopixel ring in place.
With this file you will be able to print XRAD'S NAT GEO GEODE NEOPIXEL RING DISPLAY with your 3D printer. Click on the button and save the file on your computer to work, edit or customize your design. You can also find more 3D designs for printers on XRAD'S NAT GEO GEODE NEOPIXEL RING DISPLAY.
