XT90 Power Bar
thingiverse
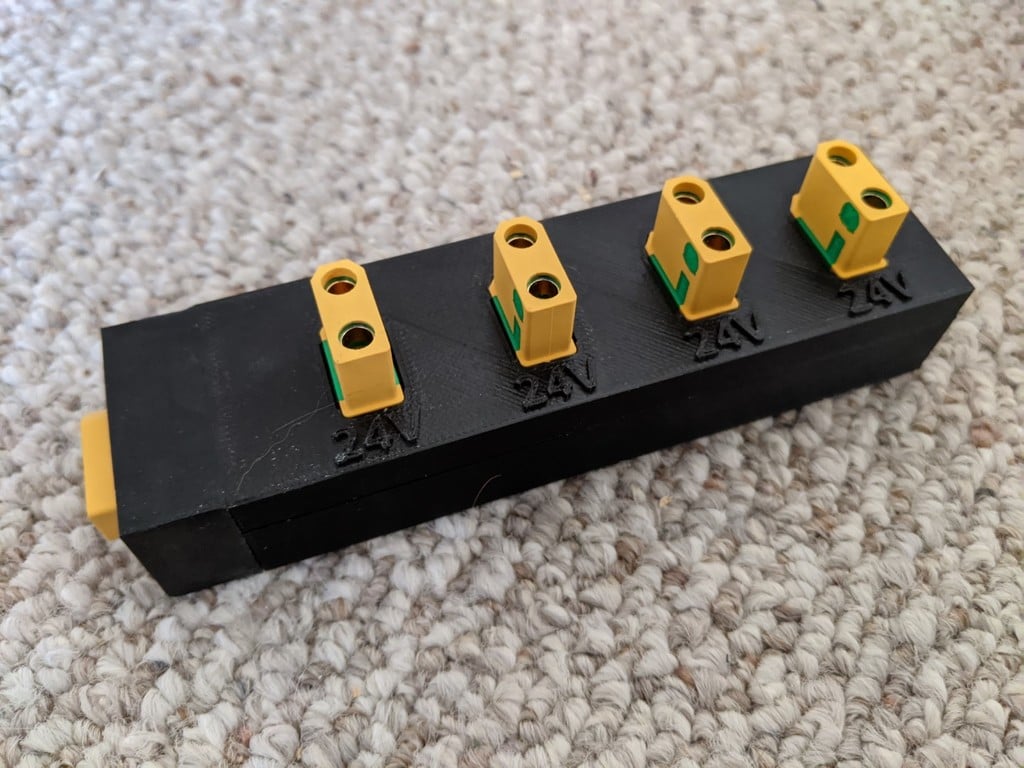
XT90 Power Distribution bar. Used for our 24V solar charging system at our flying field. We used XT90-S sparkfree connectors as we were getting sparks at 24V with our previous banana plug distribution boxes. Printed on ABS @ 25% infill. At least 2 outer layers so screws don't break walls when threaded. Used 10AWG wire, but 8AWG or lower would be fine - adjust to your requirements. Important to use wire with a silicone sleeve and leave the sleeve intact between connectors so it protects the print while soldering. I used a wire stripper to cut the silicon sleeve before and after the XT90 connectors, and then a slim wire cutter to cut between the two cuts and remove the sleeve. Lots of flux on the wire before soldering, and plenty of solder to create a positive electrical and mechanical connection. Supports only required on the bottom, for the screw holes. 4 x M3x16 screws for end/input. 2 x M3x12 screws for bottom. I used a bit of super glue on the top and bottom edge of each XT90 before quickly pushing it into the power bar. No need to glue the sides as there isn't enough contact on the sides. When you install the End/Input, make sure the orientation is correct! The positive and negative should match the orientation of the 4 connectors on the top.
With this file you will be able to print XT90 Power Bar with your 3D printer. Click on the button and save the file on your computer to work, edit or customize your design. You can also find more 3D designs for printers on XT90 Power Bar.