XU64 (N64 case for Odroid XU4)
cults3d
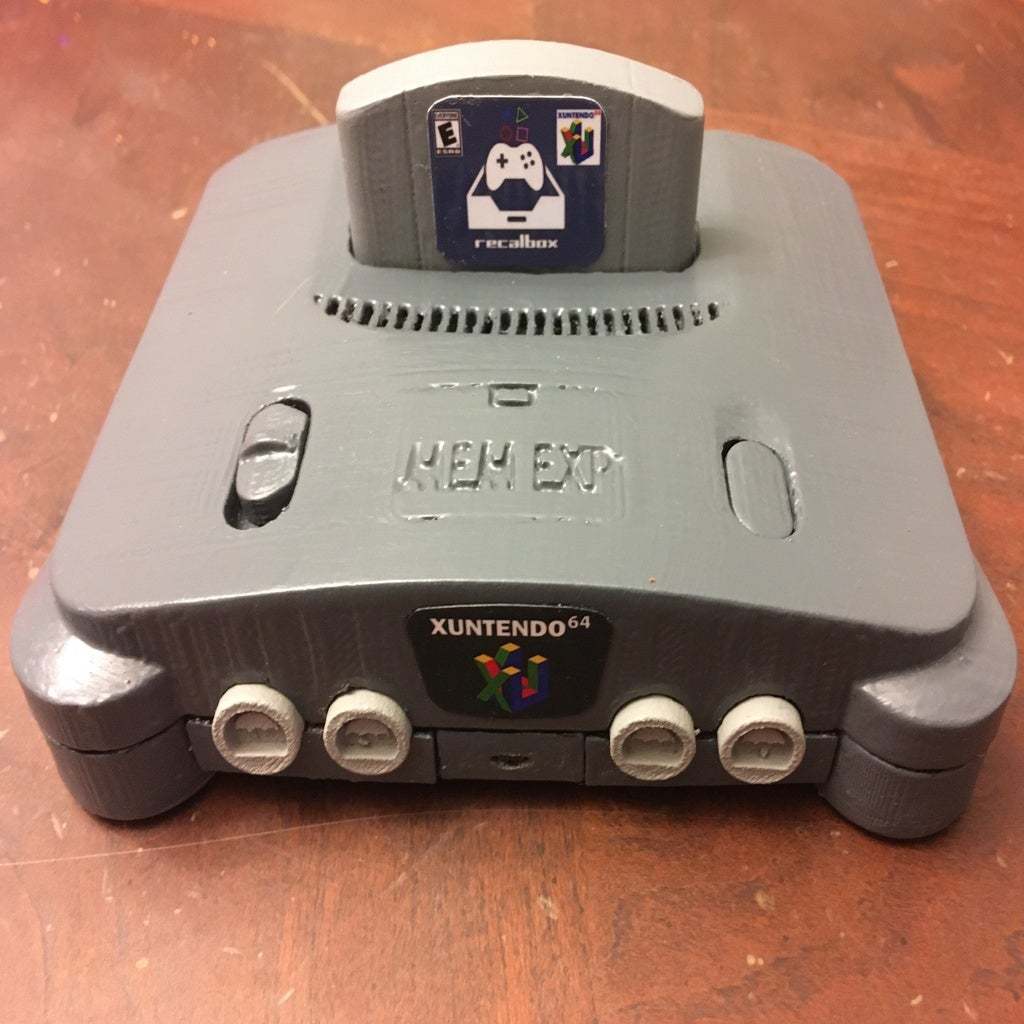
A Nintendo64 case for the Odroid XU4! First off I must thank Mr. Mike Casale for funding the development of this project. This is an adaptation of my N64 case for the Raspberry Pi 3 https://www.thingiverse.com/thing:2101165. This version can use either the reset or power switch on the case wired to GPIO pins that will function like the power switch on the board does. The original N64 console has a red power LED on the front. Rather than wiring in an LED, a fiber optic line can be used to pipe the light from the power or processor or both LEDs to the front of the console. The light pipe idea works surprisingly well. This was a fun project and the XU4 board makes N64 game play excellent. Required parts: • 3D printed parts shown above (If you want to print the case in the proper colors I recommend the following filaments or you can print them in any color and paint them like I did. All model units are in millimeters.) For the console: Dark Grey filament from 3DPrima, http://www.3dprima.com/en/filaments-for-3d-printers/pla-175mm/primaselect-pla-175mm-750-g-dark-grey.html. For the game cartridge and controller ports: Earl Grey filament from Faberdashery, http://www.faberdashery.co.uk/products-page/print-materials/earl-grey/ • Odroid XU4 with power cord and HDMI cable • 8GB or larger microSD card with software installed (I prefer Recalbox) • 7, M3 screws 6mm long (#3 1/4in long screws will also work) • Super glue • A small, squid style, 4 port USB hub (this will need to be dismantled and possibly new female ports soldered on, see pictures) For reset/power switch: • A standard PC reset switch or • A standard 6mm tact switch with header pin cables For piping the LEDs to the front of the case: • A short length of 1.8mm clear plastic cord, http://www.michaels.com/stretch-magic-bead-jewelry-cord-1.8mm-x-3m/10315671.html#q=bead+cord&pmpt=qualifying&sz=24&start=25 For the console and game labels: • Print the included PDF at 100% scale (4x6 in). Labels look best when printed on photo paper. Instructions for building USB port covers: After gluing the USB ports into the bottom of the case, attach the top of the case. Slightly insert the USB plugs into the USB ports. (Note, any thin piece of plastic that fits snugly into a USB port can be used in place of the plugs provided that the glue holds to it.) Apply some quick drying glue to the exposed ends of the plugs. Use the corresponding USB cover to press the plugs into the ports until the cover sits flush against the ports. Hold the cover in place until the glue sets then pull the cover and plugs free from the ports. Additional glue may need to be applied to adequately secure the plugs to the covers. Now glue the N64 ports you printed to the USB covers (not the top of the case). You now have covers that slide securely into the USB ports when not in use. Enjoy building your own! Check out my other 3D print projects here: https://cults3d.com/en/users/elhuff/creations https://www.etsy.com/shop/OptimalInceptions
With this file you will be able to print XU64 (N64 case for Odroid XU4) with your 3D printer. Click on the button and save the file on your computer to work, edit or customize your design. You can also find more 3D designs for printers on XU64 (N64 case for Odroid XU4).