XYZ Dimensional accuracy calibration
prusaprinters
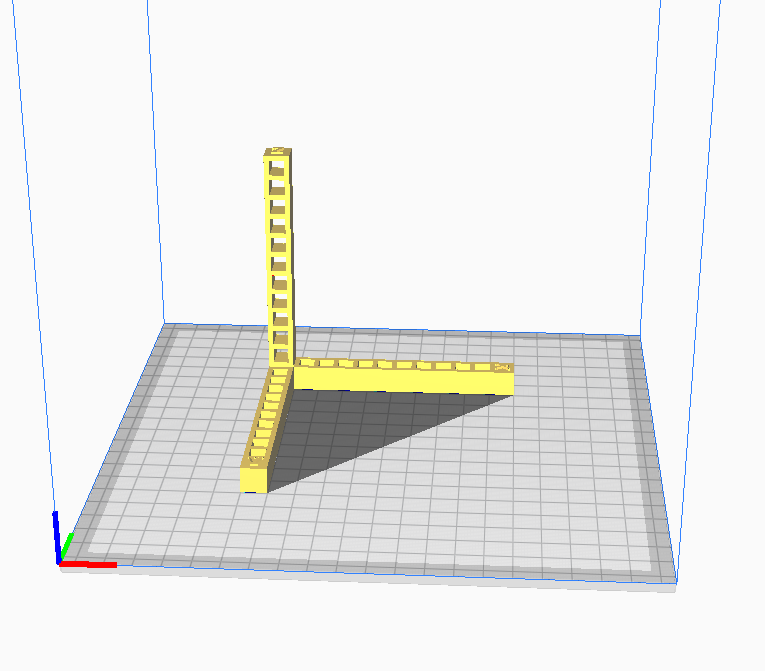
<p><strong>Introduction</strong>:</p><p>This is a print in place object aimed at tackling the XYZ dimensional accuracy calibration. That's a mouthful! Basically… if you want to print functional objects like collector card holders, boxes, hinges, doors, gears… etc… you will want this.</p><p><strong>Measurements</strong>:</p><ul><li>Each beam is exactly 10mm x 10mm x 100 mm.</li><li>Each beam runs parallel<strong> </strong>to it's axis.</li><li>Every empty space measures 10mm x 6mm x 6 mm.</li><li>Every letter is 1mm above the beam.</li><li>All the corners are at 90°.</li></ul><p><strong>You will be able to detect the following problems</strong>:</p><ol><li>Layer shifting.</li><li>Overheating.</li><li>Curling / rough corners.</li><li>Warping.</li><li>Layer separation.</li><li>Blops / zits.</li><li>Vibrations / Ringing / Ghosting.</li><li>Lines on the side of the object.</li><li>Poor briding.</li><li>Poor bed adhesion.</li><li>Under / over extrusion.</li><li>bad e-steps / rotation distance settings.</li></ol><p>The object is already placed in the correct orientation for most bed slingers, but you can always check the cover image for reference (XYZ marked in RGB is on the front left side of the printer).</p><p><strong>Recommended printer settings</strong>:</p><ul><li>Skirt is optional as it helps with the line purge.</li><li>Brim off.</li><li>Raft off.</li><li>Infill 5%.</li></ul><p><strong>Other (optional) recommendations</strong>:</p><ul><li>Make sure you follow a guide to get your printer reasonably calibrated before you do this! This is an end-game calibration test. This is what you do when you've already done everything else… including, making sure all the belts, bolts, parts are properly tightened, aligned, and well maintained.</li><li>Use a feeler gauge that's 0.05 - 0.10 mm instead of a paper sheet.</li><li>Use an hygrometer to check for humidity and dry your filament as required.</li><li>Permanently mount your two ADXL345 accelerometers (X and Y axis).</li></ul><p><strong>Goals</strong>:</p><ul><li>Each axis must measure within 1/1000 margin of error (99.9 - 100.1).</li><li>None of the previously 12 issues should be present.</li></ul><p><strong>TODO</strong>:</p><ul><li>Replace existing empty spaces with A.I generated ones.</li><li>Include a guide with steps on HOW to do the calibrations required.</li><li>Include pictures of the issues you could / can find.</li></ul><p>Please leave a comment! I'm hoping to contribute and hoping to see others contribute as well.</p>
With this file you will be able to print XYZ Dimensional accuracy calibration with your 3D printer. Click on the button and save the file on your computer to work, edit or customize your design. You can also find more 3D designs for printers on XYZ Dimensional accuracy calibration.