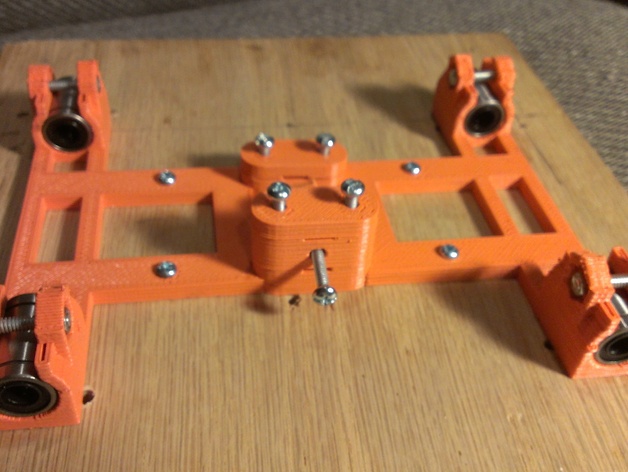
Y-Undercarriage with belt spacing mod
thingiverse
SGK did a great job of integrating several good ideas into another good idea. Using this instead of separate bearing holders and belt clamps turns a lot of fiddly alignment and measurements into a trivial 5 minute install with perfect results every time with no measurements, and also fewer holes to drill. I've added a few more tweaks to his design. The previous design had the belt entering flush with the print bed which isn't quite right. This one has a parameter for space from the bed to the belt so the belt doesn't travel at an angle. Also, there's no need for two belt tighteners, so one of those is removed. The SCAD code has been cleaned up and commented a bit. The belt clamp module has been unified so that the one module can make any of the required shapes by providing the proper parameters (and global variables). A bridging layer has been added in the belt clamp nut traps for cleaner printing. The STL provided is an SAE model for #6 screws and GT2 belts. Modify the SCAD for other screw or belt sizes. The belt-to-bed spacing should only be different if you're using different bar clamps or bearings than the standard Iteration 2 Prusa parts. NOTE that the linear bearing holder SCAD file does not use configuration.scad so the screw dimensions need to be changed there as well. Instructions Use a drill to clear the bridge layer in the belt clamp nut traps. Position over your print bed and drill appropriate holes in the bed to match the four mounting holes. I use 5/8" sheet metal screws to go into 1/2" plywood. Secure temporarily using two of these holes, then drill CLEARANCE holes into the bed for the four belt clamp screws - this gives room for the belt clamp screws to go past the "bottom" of the print and slightly into the bed when you clamp the belt. Now remove the sled from the bed again, place nuts in the belt clamp nut traps and replace and fasten the assembly to the bed. The belt on one side is fastened by the simple cap with teeth. On the other side, it goes through the channel, the tightener (with screw, captive nut and ram) goes on top of that with the teeth facing up, then the plain cap goes on top of that.
With this file you will be able to print Y-Undercarriage with belt spacing mod with your 3D printer. Click on the button and save the file on your computer to work, edit or customize your design. You can also find more 3D designs for printers on Y-Undercarriage with belt spacing mod.