YAHME3 (right) -Yet Another Hemera Mount for Ender 3pro v14
prusaprinters
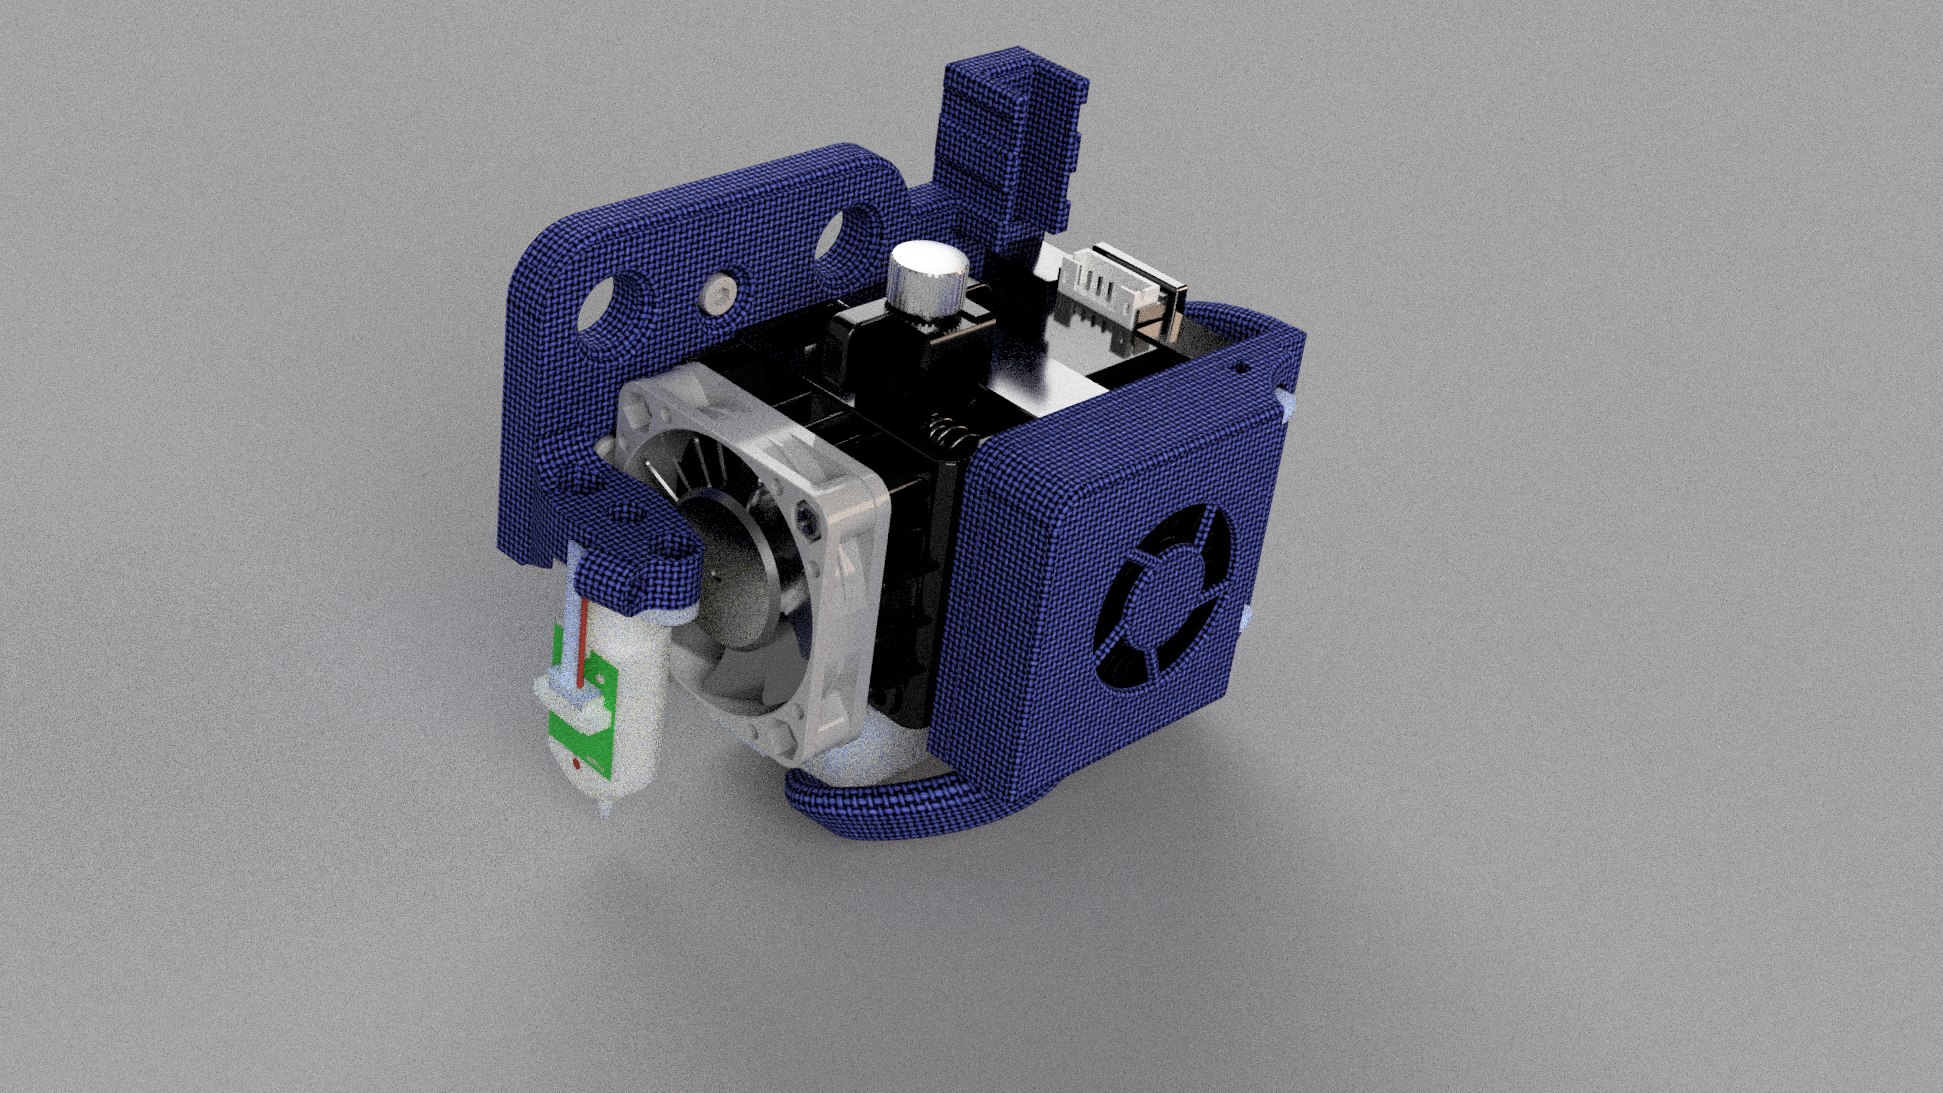
<h3> YAHME3 -Yet Another Hemera Mount for Ender 3pro </h3><p>But its based on the existing metal x carriage mount so you do not have to dissasemble the whole printer<br><br><strong>Uses stock backplate leaving access to all attaching screws</strong></p><ul><li>bl touch mount</li><li>endoscope mount (and grub screw hole) (5mm version. for that close up layer view)</li><li>has strain relief moounts for zipties to fasten your cables to and cable guides</li><li>use of stock metal x axis plate and most creality stock bits (including blower fan)</li><li>dust cover for blower fan (aesthetic)</li></ul><h3>WARNING: hotend and bl touch will be moved from original position so you will need to adjust ends stops and firmware settings to match!! forgetting this can cause your hotend to crash into the bed badly</h3><ul><li><strong>hotend moves down(z) exactly 10mm and forward(y) 10mm</strong></li><li><strong>bltouch is offset 0mm(y) and 34.741mm(x) to the left and when retracted should be 2mm(z) up</strong></li><li><strong>bltouch z offset canbe affected by your configuration of your hotend nozzle and type of heatbreak (ie diffrent for volcano or supervolcano or how many turns you twisted in the hotend tip)</strong></li></ul><h3>Assembly and printing</h3><ol><li>I printed in high temp resin.. (because i can avoid wierd supports ) but you could print in ABS and print at 40% infill for strength with 4 walls</li><li>print one each of backplate, blower plate, blower cover</li><li>assemble backplate first to original steel plate on x carriage</li><li>use original creality screws from teh fan shroud to attach in same screw locations the pins for hoten will add support to backplate)</li><li>then attach hemera direct kit (you can leave the fan and cables/thermistor/heater for ease of asembly</li><li>attach bltouch (cable stays free but position near tie mount</li><li>attach heater and thermistor and route cables to the right side towards the stepper</li><li>run those cables under the stepper then along back center of stepper and up to the stepper connector.</li><li>add small zip tie to bundleat the stepper motor</li><li>atach fan on bltouch side run cable to the bltouch mount tab</li><li>add small zipt tie to bundle bltouch wire /hemera fan wire to the bltouch tab with the hole using hole as mounting spot</li><li>get blowerplate and Snap in blower fan to plate with opening down and cable on right side</li><li>get blower cover and FIT on top of blower plate ( put cable in supplied groove on backside of cover)</li><li>position blower plate to hemera and attach 7-8mm ong screw to the hemera trapped nuts this will hold the cover on and the fan and the ducting</li><li>route carefully bltouchand hemera fan wires to not be in the way (near backplate) and then up strain relief</li><li>route stepper wires and hotend wire bundle into strain relief</li><li>zip tie them in place</li><li><strong>follow hemera tuning and firmware instructions for your mainboard used to set propper steps and PID tuning and recheck belts are properly tensioned and bed re-leveled by hand before trying to operate fully</strong><br> </li></ol>
With this file you will be able to print YAHME3 (right) -Yet Another Hemera Mount for Ender 3pro v14 with your 3D printer. Click on the button and save the file on your computer to work, edit or customize your design. You can also find more 3D designs for printers on YAHME3 (right) -Yet Another Hemera Mount for Ender 3pro v14.