Yazzo Linear Slide Carriage
thingiverse
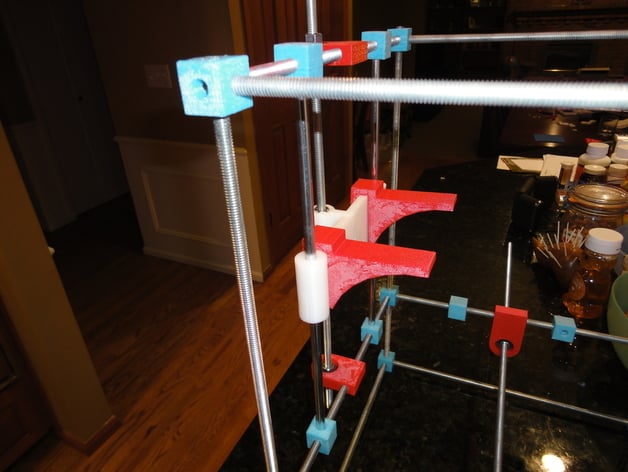
Introducing an improved linear slide carriage design by following these steps: firstly, measure the center distance from the lead screw to the mounting rod's center and that to the sliding rods' centers. Then, modify the OpenScad file according to your measurements for perfect fit. Print out a couple of pieces, heat up the holes for capture nuts using a heat gun, insert the nuts, and mate them together with a half-height nut as an alignment tool. Attach smooth rods into their places on carriage and endoskeleton, place cantilever clips over the verticals, and voila! This design is versatile enough to be used for both vertical rise and horizontal carriage applications, but remember to add captured bushings in the holes for optimal performance and avoid binding or wobble.
With this file you will be able to print Yazzo Linear Slide Carriage with your 3D printer. Click on the button and save the file on your computer to work, edit or customize your design. You can also find more 3D designs for printers on Yazzo Linear Slide Carriage.