Yellow Jacket Power Strip Clip
thingiverse
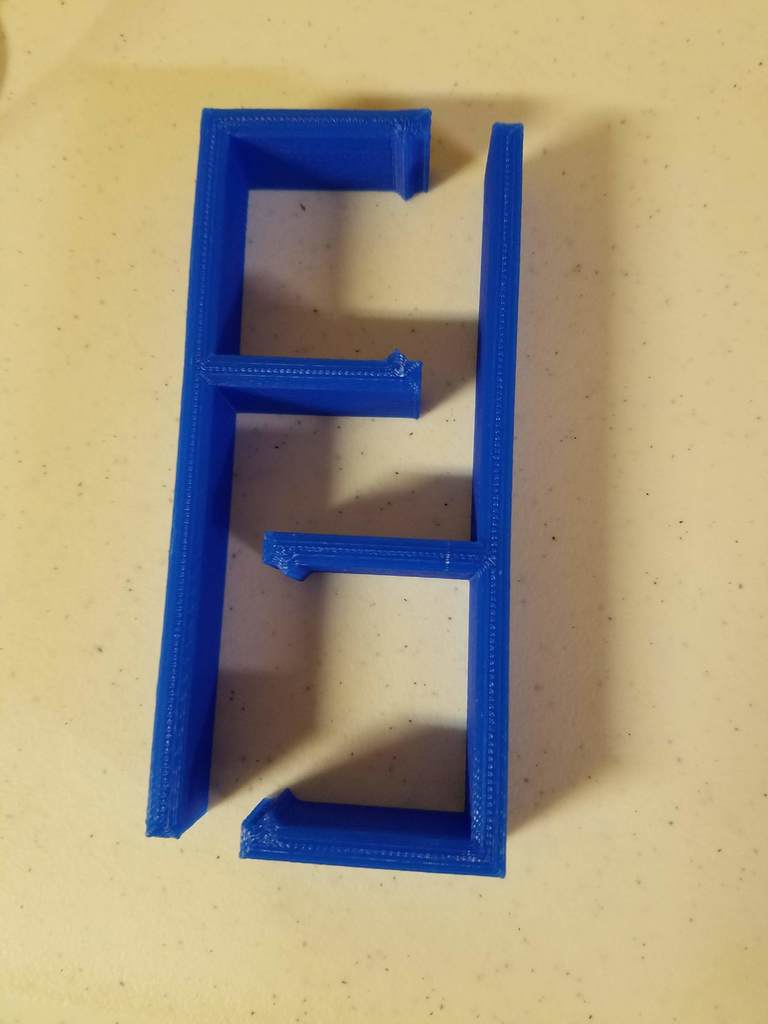
After I mounted the Yellow Jacket power strip to the wall to clean up my cables behind monitors I wanted to put the power bricks up there since it looked like a shelf. Yellow Jacket power strip product link: https://www.homedepot.com/p/Yellow-Jacket-5-ft-9-Outlet-Metal-Heavy-Duty-Power-Strip-with-Mounting-Brackets-51530001/303031856 Measuring steps: 1) Measure the power strip 2) Measure where you want the part to clip on. You're basically designing what the wall clips do, but you're attaching the clip from the other side. I made simple triangular shapes instead of getting fancy and copying the shape of the wall clips. 3) Measure how high you want the clip to be. In my case I measured the laptop power brick. Modeling steps: 1) Lay out construction lines on a new sketch according to the dimensions you measured 2) Use the line tool to put lines down with respect to the construction lines. You should have a complete shape. 3) Extrude the shape for whatever width you like. My design is narrow enough that I can fit two of these clips between outlets if I need to. Printing steps: 1) Lay it flat on one side. 2) No supports needed. 3) Print in whatever layer height and material you like. This part won't require special materials.
With this file you will be able to print Yellow Jacket Power Strip Clip with your 3D printer. Click on the button and save the file on your computer to work, edit or customize your design. You can also find more 3D designs for printers on Yellow Jacket Power Strip Clip.