Yet Another Pelican-style Case
thingiverse
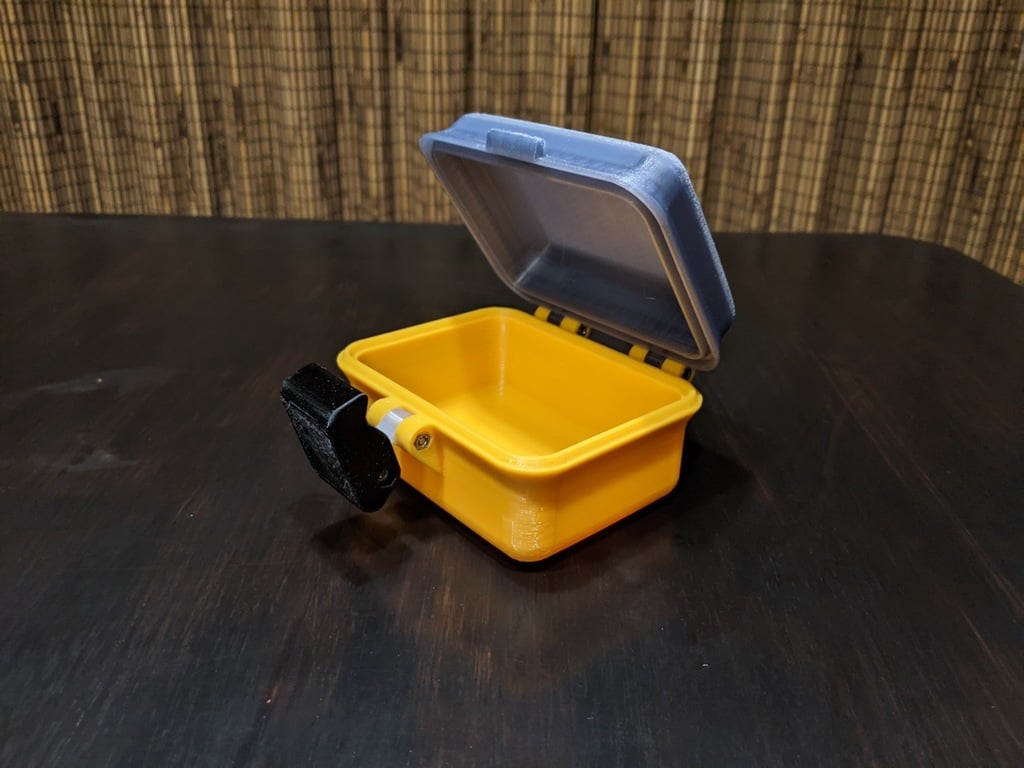
I wanted a pelican-style case for slightly less than the $20 retail price. It's also good practice with 4-bar linkage (the clasp). Not meant to be waterproof, but a thin layer of silicone in the lid side (valley) would probably help. Design intent(s): - top (lid) would be translucent / clear PETG or similar - bottom (base) would be colorful PETG / same material. Hard. - link should be pretty soft, color doesn't matter. TPU maybe, or even something springy. PETG makes for a pretty firm grab. - clasp would be black, PETG works well here. The pictured print is my first complete "tester" unit, about 3"x4" x2" tall. The lid, base, and clasp are all printed in eSun PETG; the link is Taulman PCTPE (Nylon, basically). All parts are designed to print with minimal support. Assembly as pictured requires 4 m3 x 20mm bolts + nuts. I'm uploading a few more sizes, 7x4.5 and 5x3 work well! The 6x4 has an "inserted lid" which can have a 6x4 PETG sheet (https://www.amazon.com/gp/product/B08JCTNDYW) inserted mid-print; see below for notes. Here's a brief video of the snap closure: https://www.youtube.com/watch?v=lGJPoOLIj8U How to PETG sheet: 0) obviously you're printing with PETG for this part. PLA, ABS etc may not work as well -- the print will be the right shape, but they won't "stick" and would need some adhesive help post-print. 1) obtain some PETG plexy. The link above works; thickness is critical, as the print is sized specifically for that stuff 2) Figure out how to do color changing with your printer. It's not hard. You basically need to be able to pause the print at a layer height, have the head move out of the way. In the slicer, inject a color change at the last layer before the cover starts printing over top of the inserted / open space. Be sure to disable support for this part of the model -- this will look like a nasty overhang, but the PETG sheet will provide the needed coverage. Note that you DO still need support on the latch portion. This was not hard with Simplify3D; if it's hard for you please let me know, I'm sure we can sort this out. 3) Print up to the pause 4) Insert the PETG sheet. The model leaves a little clearance at the edges, but I've had some better success nipping a little off each corner too. 5) resume. Be sure the sheet gets covered on the sides, just babysit that layer. If you have a magnetic bed, a few well-placed magnets might help hold it still. Once the first layer is down you should be fine. 6) finish printing as normal. The finished part will be loose on the "top" of the lid, that first couple layers under the lid. They weren't hot when the lid went down, so they won't be fused to it. This is PROBABLY FINE, but thin superglue can help you here. Or UV adhesive for PET, like https://www.amazon.com/gp/product/B085HH7FF7. A tiny bit of superglue around the edge will wick into the filament and up against the PETG. Let it dry. Or a small bit of the UV stuff, wipe it clean first, then hit it with the curing light. Note that the inside edge of the lid will be bonded really well; the hot filament will stick to it just like any other PETG layer.
With this file you will be able to print Yet Another Pelican-style Case with your 3D printer. Click on the button and save the file on your computer to work, edit or customize your design. You can also find more 3D designs for printers on Yet Another Pelican-style Case.