Yet another Ramps+Arduino Mega 2560+LCD 12864 + tinyfan enclosure
thingiverse
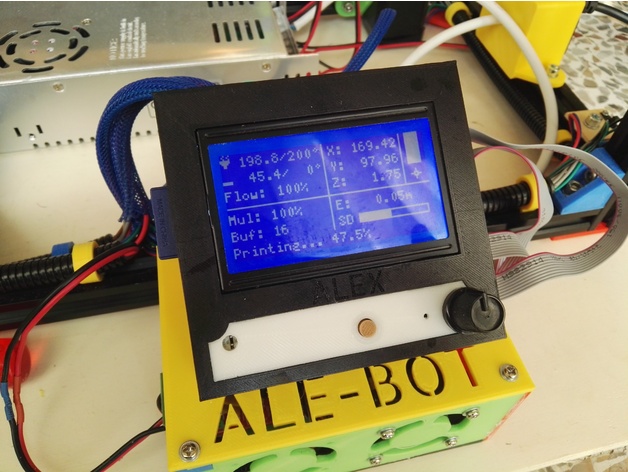
Thi kit as been designed to be printed in several parts then glued together. In view of commissioning the second extruder I needed a fan extender. This small device hangs out from the Ramps board, then I had to design larger enclosure. In the prototype I designed the slots for two fans, but after printing I found out that one is noisy enough and in any case I don't have enough space for both of them. I originally designed all the slots using several 3d models of Ramps+Arduino and LCD12864 found on Internet. Then, I realized that my hardware didn't match 100% with 3d models. It was slightly different, specially in connectors size and position. For the same reason I preferred to design the front board separated by the rest of LCD shell I left some clearance around the slots, so I don't expect that you can have too much problems, but if you really need some adjustments ask me and I'll make your dedicated STL file. I also put my name on the top lid and on the LCD shell. If you want your own, ask me and I'll prepare a dedicated STL file for you. Edit 25/05/2019: added front file with two holes for fans. File name is: ramps_encl - front_side-2fans.stl Print Settings Printer: D-bot Core-XY Rafts: No Supports: No Resolution: 0.1 mm but 0.15 should also be ok Infill: 50% Notes: Supports needed only for LCD enclosure supports Post-Printing Hardware needed Some drops of CA glue Some M3 screws Some M3 nuts 1 fan 40x40x10 mm Instructions for Ramps enclosure Put the M3 nuts inside their pockets Glue the right rail and the front rail (green) on the bottom baseplate (black). Glue the right side (red), the front side (green) and the rear side (orange) on the baseplate Slide the board inside Connect the left side (blue) with the previous assembly using two screws Connect the top lid (yellow) using four screws Instructions for LCD 12864 enclosure Put the M3 nuts inside their pockets Glue the button rail (red) to the front board (white). Glue this assembly to the LCD shell (dark grey) Turn the assembly upside down Slide the reset button (bronze) into the button rail Put the LCD 12864 into the shell Connect the bottom lid (orange) using four screws Glue or simply connect by pressure the two blue supports using the four slots into the bottom lid Finally you can attach the LCD to the board enclosure by sliding the blue supports in the rails on the yellow top lid.
With this file you will be able to print Yet another Ramps+Arduino Mega 2560+LCD 12864 + tinyfan enclosure with your 3D printer. Click on the button and save the file on your computer to work, edit or customize your design. You can also find more 3D designs for printers on Yet another Ramps+Arduino Mega 2560+LCD 12864 + tinyfan enclosure.