Yet Another RepRap Style Printer
thingiverse
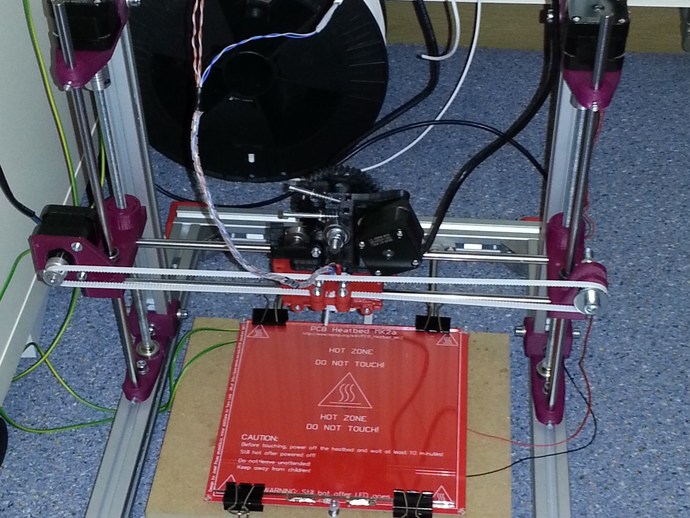
Designing and building a 3D printer is an exciting project that not only provides you with a functional machine, but also teaches you valuable lessons about design and engineering. However, there are several pitfalls to avoid when creating your own printer, as I learned the hard way. Firstly, don't make the mistake of purchasing a hotend/extruder set from eBay without thoroughly researching its quality. I made this error and it led to a terrible hotend that caused me frustration and eventually failure. Instead, consider making your own hotend - it's challenging but educational, and gives you full control over the design. Just be prepared to have the appropriate tools, such as a drill press, at your disposal. Another common mistake is related to printing with different materials like PLA or ABS. I found that printing PLA with a metal hotend can be tricky due to friction inside the barrel. ABS, on the other hand, works well when you cool the cooling fins of the hot end with a fan. It's essential to find the right balance of materials and design for your printer. In terms of mechanical design, I made several errors in my z-axis setup. Initially, I designed it with a ball bearing at the bottom, motors on top, and flexure bearings on the y ends. However, I designed the flexure bearings too stiff, which resulted in significant wobble. To fix this issue, I raised the motor ends slightly, allowing the lower end of the threaded rods to hang in mid-air with the help of a flexible shaft coupler. This solution successfully eliminated the wobbling. Another design flaw was related to my optical z-endstop. The flag used to trigger the endstop was made of light-blue ABS, which turned out not to be 100% opaque in the infrared spectrum used by the photoelectric sensor. I solved this problem temporarily by covering the flag with duct tape, but it eventually peeled off. For a long-term solution, consider replacing the flag with one made of aluminum. Issues also arose in my x-axis design, specifically with the flexure bearings and hex holes for nuts. The flexure bearings were too thin and broke during assembly, while the hex holes were too small, making it difficult to insert nuts and springs. These problems were solved through improvisation - I removed the unnecessary tower-like structures from the bearings and cut out excess material from the hex hole to accommodate the nut. The extruder also presented challenges, as the idler easily broke when tightened too much. To prevent this, print an extra idler and keep it as a spare part. If it breaks before you have a replacement, try fixing it with acetone, but be cautious not to use too much. Lastly, pay attention to small details that can go wrong, such as feet that are too short for standard screws, misaligned belts, or colliding motors. Address these issues promptly and adapt your design accordingly. In summary, designing a 3D printer is an enriching experience that requires careful planning, research, and attention to detail. Learn from the mistakes of others, but also be prepared to improvise and adapt when necessary. With persistence and problem-solving skills, you can create a functional and unique printer that meets your needs.
With this file you will be able to print Yet Another RepRap Style Printer with your 3D printer. Click on the button and save the file on your computer to work, edit or customize your design. You can also find more 3D designs for printers on Yet Another RepRap Style Printer.