Z-axis endstop block for Ultimaker Original +
thingiverse
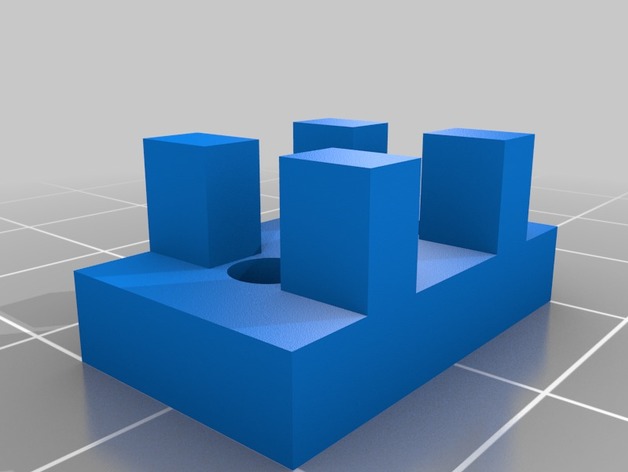
This is an upgrade for the Ultimaker Original Z-end switch. If you tighten the screws of the end switch, it turns and your settings are lost. This part has four claws that grip into slotted holes, preventing the switch from turning. The second improvement is that it sets the end switch 4 mm away from the wall. Thus, the end switch gets reliable contact with the tab on the Z stage. Print Settings Printer Brand: Ultimaker Printer: Ultimaker Original Rafts: Doesn't Matter Supports: No Infill: 20% Installation Remove the z-switch and put this part into the slotted holes from the inside of the printer. The claws grip into the holes. Reinstall the z-switch, as the original screws are long enough. Readjust the z-stage. To adjust the z-stage, place a CD under the nozzle with the silver side up. It is approximately 1.1 mm thick. When the nozzle touches the CD, you should hear a click.
With this file you will be able to print Z-axis endstop block for Ultimaker Original + with your 3D printer. Click on the button and save the file on your computer to work, edit or customize your design. You can also find more 3D designs for printers on Z-axis endstop block for Ultimaker Original +.