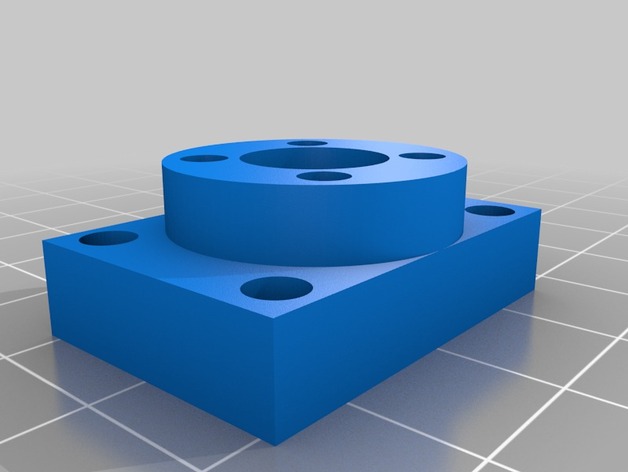
Z axis lead screw upgrade for Solidoodle metal bed get rid of z wobble and z banding!!!
thingiverse
Note: I will not be held liable for any damage that may occur during this upgrade so please do at your own risk but the directions below is what i personally performed and i was very pleased with the results. So starting off with why i performed and took the time to discuss my upgrade experience: I Finally got fed up with z wobble were the axis of the previous 5/16-18tpi embedded stepper motor rod was bending due to stress and fatigue over a few hundred prints causing the rod to ultimately deform and start moving the z axis in the y and x direction during the print. Other info: This upgrade should work for solidoodles with the metal plate such as the Solidoodle 2 Pro, Solidoodle 3, and Solidoodle 4. Since their forming of the frame involves stamping of metal and riveting the printer together there may be some variation in the dead center location for the path of the leadscrew. Which is why there is a perfect, a 1mm offset, and a 2mm offset which one should work depending on the actual location of the motor shaft according to the hole to the build plate mount. (Note: i have used 1mm offset stl for a solidoodle 2 pro and my solidoodle 3 so most likely try that one first not yet tested on a solidoodle 4 yet.) Parts to get started: x1 stepper motor preferably one with a flatten shaft on one side (i used kysan 1124090 stepper motor which is good sized nema 17 but very accurate and reliable stepper motor and is about $10 on ebay) x4 50mm M3 screws for the new stepper. ($3.00 for a 10 pack on ebay) x8 20mm M3 screws ($2.00 on ebay) x8 M3 Lock Nuts ($2.00 on ebay) x1 Nema 17 Flexible Shaft Coupling 5mm to 8mm Coupler ($2.50 on ebay) x1 8mm lead screw rod w/ Nut T8 Trapezoidal ACME (use 200mm for 6inch solidoodles and 300mm for 8inch solidoodle, on the 8inch solidoodles may need to cut lead screw down a bit or make a hole in the frame. Should cost around $7-$12 on ebay) x1 printed lead screw upgrade stl. If you only have one printer i would suggest printing one of each and make sure form and function is okay. You will also require a drill with relatively high torque, a 3/8 inch nice sharp drill bit, something to wipe all the old grease off and protect your work-space. All in all total z axis upgrade will be about $27-$30 if you already have the drill and drill bit which is great if you would like to get finer detailed prints and hopefully eliminate that stubborn z wobble. Directions: 1) Once you have acquired all required items, Turn off power and disconnect power supply plug from the power adapter to remove into an open space. Get a few paper towels and maybe some newspaper to lay in the work-space. 2) Remove the motor screws by laying the solidoodle on its side and carefully taking the 4 screws out of the motor without stripping them. Next, remove the hose clamps for the two smooth rods. Third, remove the stepper motor wires, heated bed wires from the motherboard. Fourth, take the old stepper with the 5/16-18 threaded rod off of the build platform. Also remove the Limit switch from the build platform. 3) get your drill and drill bit ready and put your build plate in a place were you can hold on to it (i would recommend gloves considering solidoodle completely disregarded de-burring some parts of the build plate as this will remove the risk of slicing your skin open) Once you have the build platform in a good place start drilling with the 3/8 inch drill bit untill the old embedded nut comes out. (there may be smoke that comes due to the access grease getting heated up and this is normal) 4) once the old nut is out it is time to test fit the components. Install the new motor to the frame. After this is complete, attach the 8mm/5mm coupler to the stepper motor and put the bed and the smooth rods back on the printer and secure them. The build platform should be free to move and now you can test fit what printed stl upgrade will work by aligning the holes and seeing what look like it fits best/most concentric. Put lock nuts in the locations once the best printed part is selected and secure the brass nut onto the printed piece. 5) once this is done, attach printed piece to the build plate and secure down with the other 4 lock nuts. Now, put the leadscrew in and if it doesnt go in easily it is best to remove the stepper motor and put the lead screw into the brass nut and then reinstall the stepper and secure the leadscrew into the coupler. 6) lastly, since the thread pitch is very different, you must change the steps per mm in your printer settings. So, either you can utilize the excel file within the document to input your old steps to make your new steps if you got the recommended lead screw or you can enjoy driving a formula to get the correct steps per mm. I hope these directions were clear and easy to follow and now hopefully you now have a much better working solidoodle to enjoy for future prints!!! Please comment if any improvements can be made and if your upgrade was a success. Thanks and have a great day! Print Settings Printer Brand: Solidoodle Printer: Solidoodle 3 Rafts: No Supports: Yes Resolution: .1-.2 (100-200 micron) Infill: 30-40% Notes: Only support material required is for the nut location for the brass screw to lock down. Printed at 60mm/s on a solidoodle 3. Settings may vary by printer. Post-Printing Post Printing will hopefully just be removing the support material. Tested in many prints and as long as your printer is capable of printing easily removable support material and your printer prints within .5-1mm accuracy you should not have a big issue with this upgrade. However, if you can not get decent accuracy some sanding and drilling may be required.
With this file you will be able to print Z axis lead screw upgrade for Solidoodle metal bed get rid of z wobble and z banding!!! with your 3D printer. Click on the button and save the file on your computer to work, edit or customize your design. You can also find more 3D designs for printers on Z axis lead screw upgrade for Solidoodle metal bed get rid of z wobble and z banding!!!.