Z Height Jig
prusaprinters
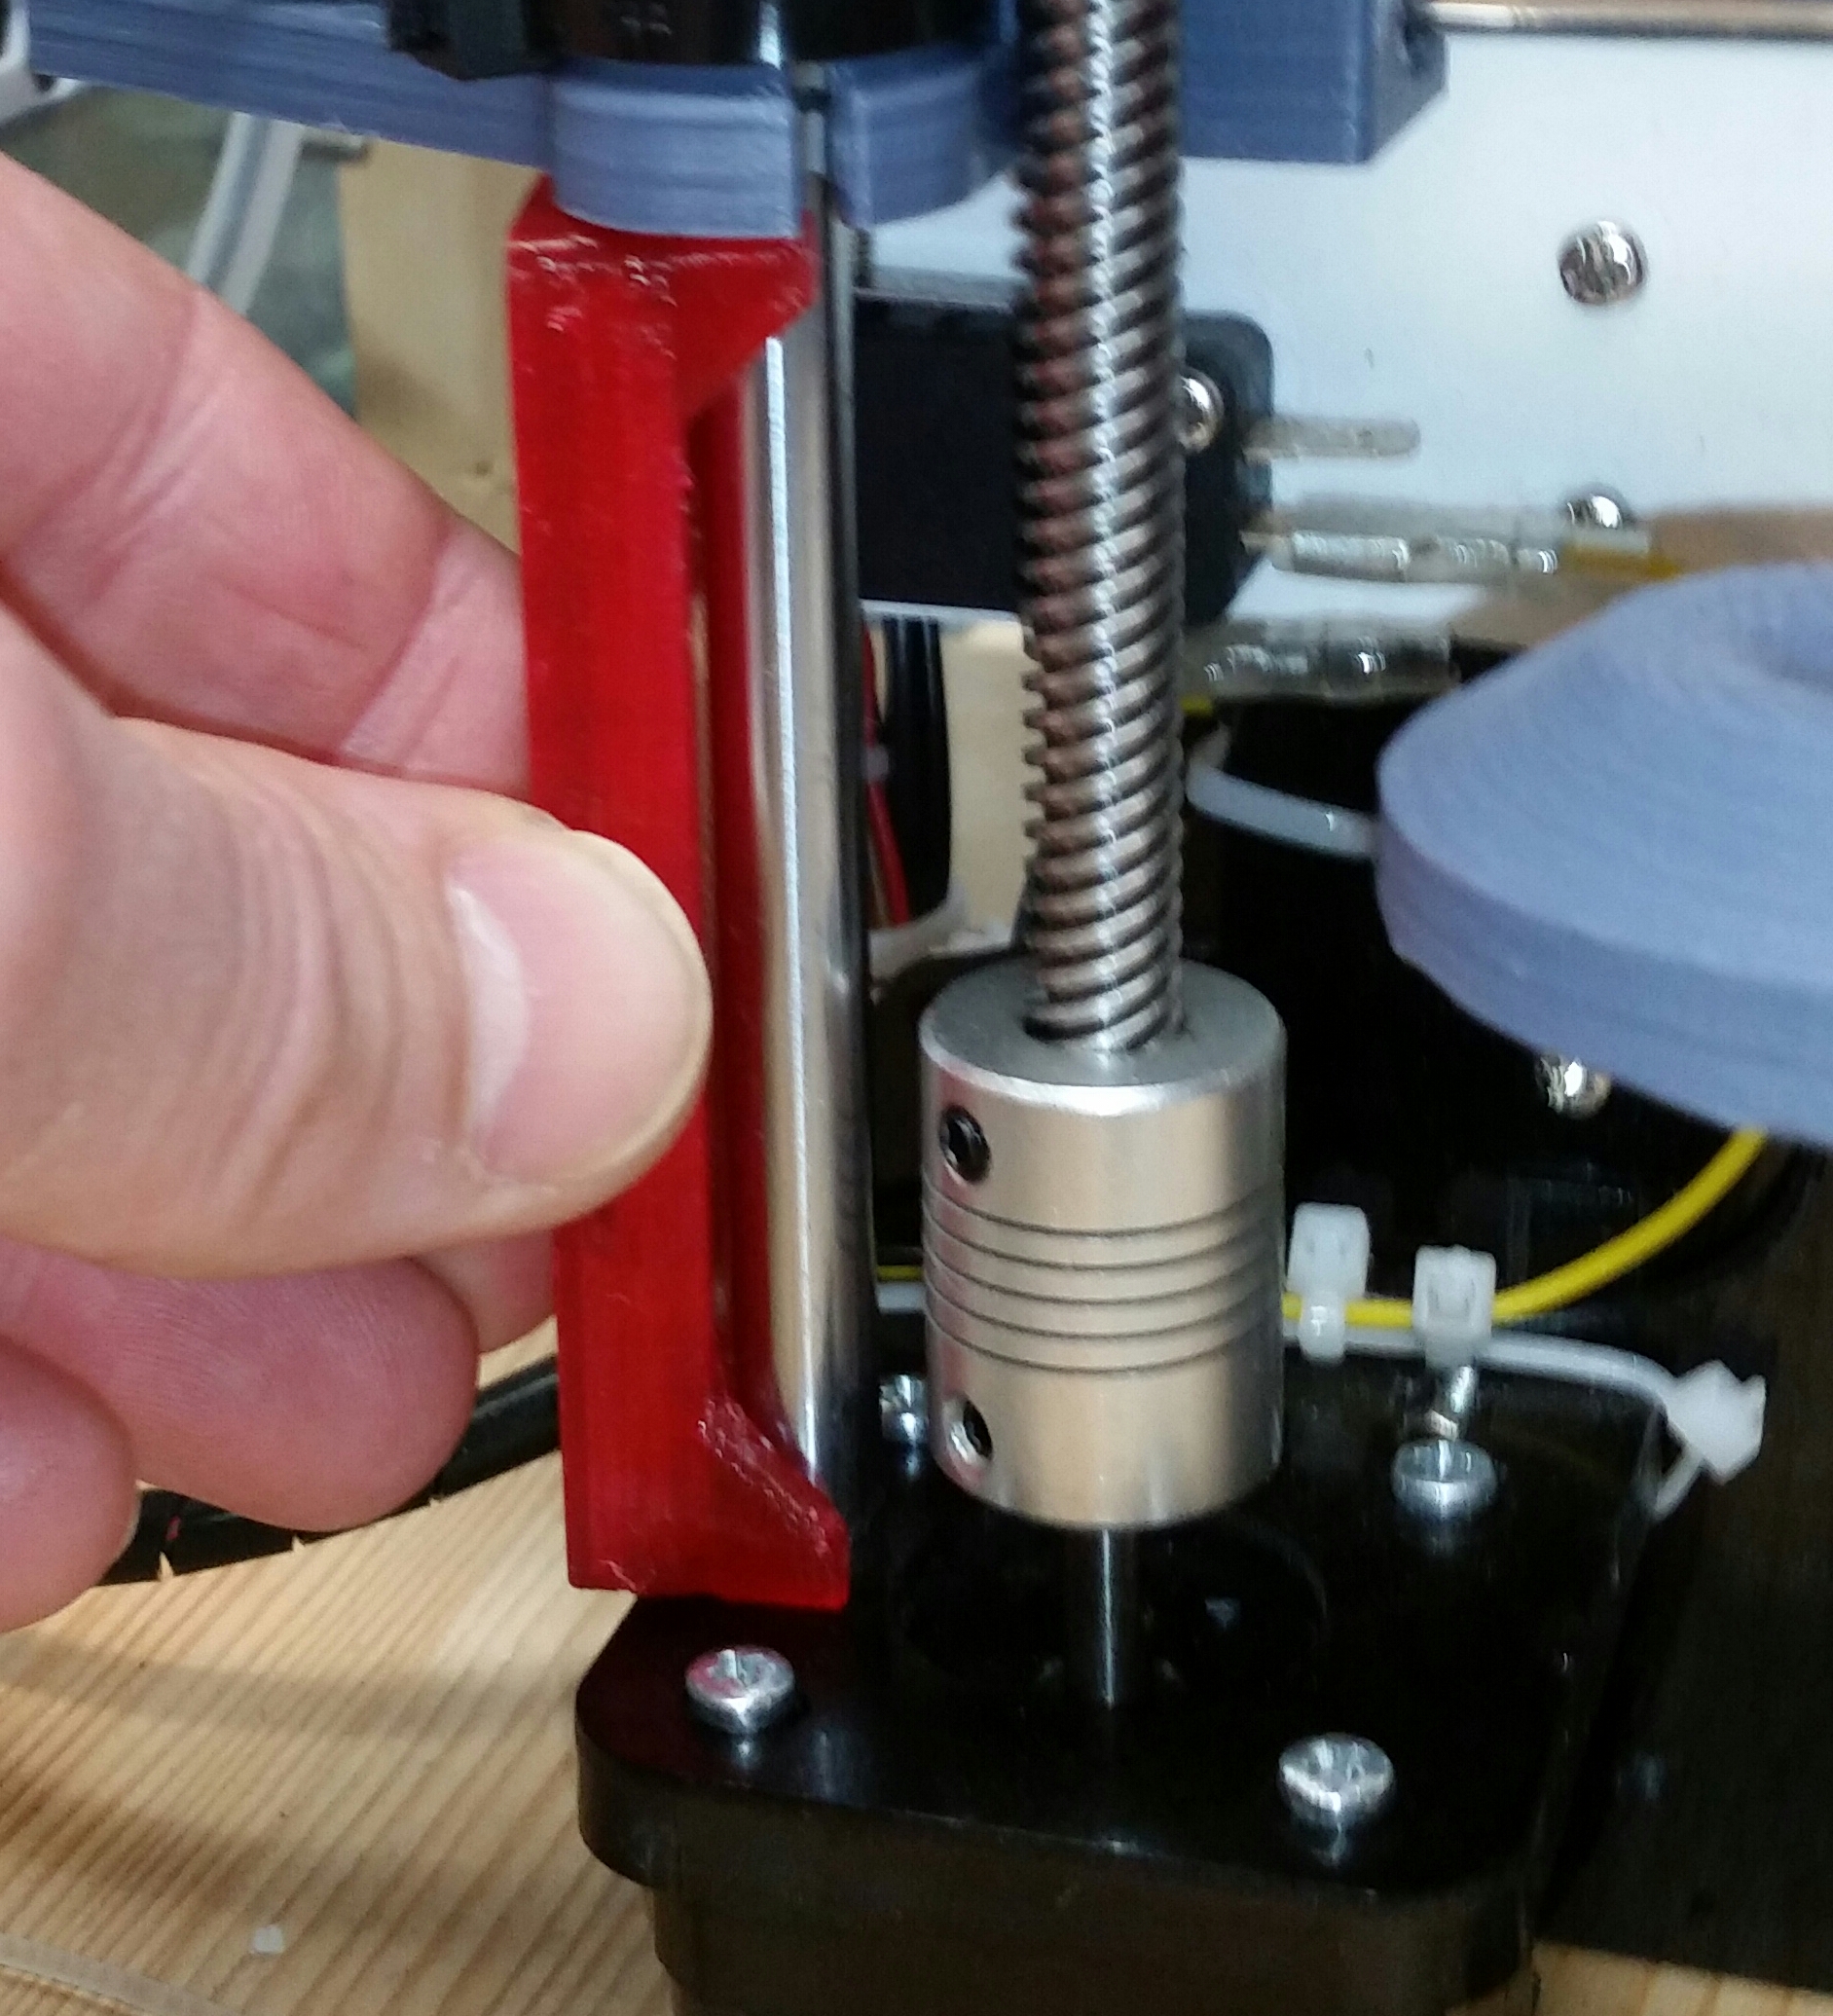
<p>This measuring simple jig fits between the top of the z-motor mounting plate and the bottom of the x mounts. When it fits about the same on both sides you should be good to go! -Alternatively you could make two of these and lower your z until it bottoms out on both.</p> <p>My printer as it is setup up currently rarely needs any adjustment if the bed is well leveled once. I just do a quick 4 second check with the jig after homing and about 10% of the time I may need to turn a z motor a click or two.</p> <h3>Print instructions</h3><h3>Category: 3D Printer Accessories Print Settings</h3> <p><strong>Printer:</strong> Tronxy P802E</p> <p><strong>Rafts:</strong> No</p> <p><strong>Supports:</strong> No</p> <p><strong>Resolution:</strong> .2</p> <p><strong>Infill:</strong> ~10%</p> <p><strong>Notes:</strong></p> <p>Flip the model flat on its back. Then scale the length to your needs. It is 100mm long to be easy to scale. My setup happens to require 77MM. So I would scale in one dimension to 77%.</p>
With this file you will be able to print Z Height Jig with your 3D printer. Click on the button and save the file on your computer to work, edit or customize your design. You can also find more 3D designs for printers on Z Height Jig.