Z-Marker for Creality 3D CR-10S
thingiverse
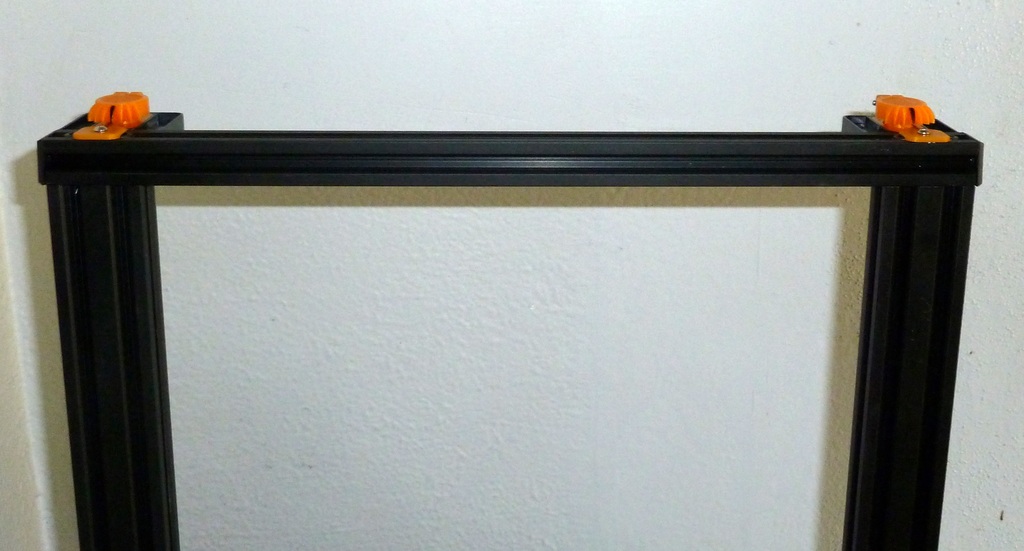
Z-Marker Unfortunately, the CR-10S also has the problem that the right Z-axis moves in relation to the left Z-axis. This occurs less frequently than with the Anet A8, for example, but is still possible. The effect: The nozzle either takes off more and more or approaches more and more the print bed the further to the right it is. Since the cause cannot be identified, the print is interrupted and the print bed is then re-leveled. The print is then no longer completely at an angle and the Z-axes can of course adjust again at any time. Remedy: My Z-Markers First, of course, the "Z-markers" must be set exactly. Before printing, set to "Home" and if necessary rotate the right Z-axis of the Z-coupler until it matches the left "Z-marker". I handle it like this: When starting printing, when printing Brim or Skirt, if necessary turn the right Z-axis of the Z-coupler without interrupting the printing process. Since the stepper is in operation here, a little more force has to be applied. 22.09.2018: I have now added version 2 of the marker. Additionally 2 teeth (best the third from the outside) should be marked. --------------------------------------------------------------------------------------------------------------------- Leider gibt es auch beim CR-10S das Problem, dass sich die rechte Z-Achse gegenüber der linken Z-Achse verstellt. Dies tritt zwar weniger häufig als zum Beispiel beim Anet A8 auf, ist aber trotzdem möglich. Die Auswirkung: Die Druckdüse hebt entweder immer weiter ab oder nähert sich immer mehr dem Druckbett je weiter rechts sie sich befindet. Da man die Ursache nicht erkennt, wird der Druck abgebrochen und dann neu gelevelt. Der Druck ist dann nicht mehr ganz im Winkel und die Z-Achsen können sich dann natürlich jederzeit wieder verstellen. Abhilfe: Meine Z-Marker Zuerst müssen natürlich die „Z-Marker“ genau eingestellt werden. Vor Druckbeginn auf „Home“ stellen und falls nötig die rechte Z-Achse beim Z-Koppler drehen, bis sie mit dem linken „Z-Marker“ übereinstimmt. Ich handhabe das so: Beim Druckstart, wenn Brim oder Skirt gedruckt wird, falls nötig die rechte Z-Achse beim Z-Koppler drehen ohne den Druckvorgang zu unterbrechen. Da der Stepper hier in Betrieb ist, ist ein wenig mehr Kraftaufwand nötig. 22.09.2018: Ich habe nun Version 2 des Markers hinzugefügt. Hier sollten noch zusätzlich 2 Zähne (am besten jeweils der dritte von außen) farblich markiert werden.
With this file you will be able to print Z-Marker for Creality 3D CR-10S with your 3D printer. Click on the button and save the file on your computer to work, edit or customize your design. You can also find more 3D designs for printers on Z-Marker for Creality 3D CR-10S.