Zad Nozzle Fan Duct mk3 v1.0 for Ender 3 S1 Pro Spriter extruder and 5015 blower fan
thingiverse
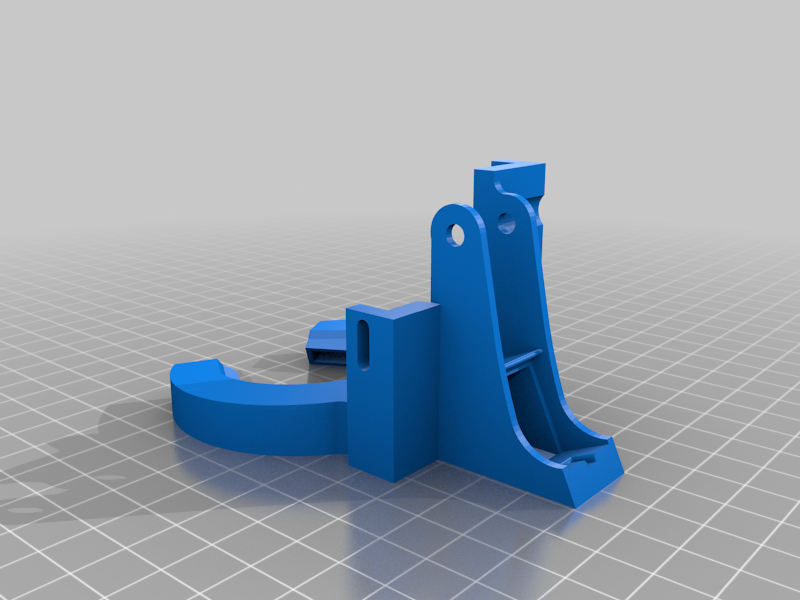
This is my 3rd attempt to design an upgraded fan duct for my Ender 3 S1 pro (with sonic pad), upgrading from the original to a 5015 blower fan 24v (you can use a 12v with a tension regulator) I tested some fan ducts around, paid or free, and it was very stimulating to design and print a functional (and working) upgrade of the original Spriter fan duct. After I switched to Klipper with the Sonic Pad (kudos to Creality), The cooling aspect of printing became really fundamental. Printing at 100-150 mm/sec with PLA or silk PLA became a challenge, and a lot of effort needed to obtain perfect or almost perfect printed parts (in my case I print a lot of vase for ceramic molds or for the sake and joy of designing them). Speed-Temp-Cooling-Dimensions, all togheter make a hard equation to solve. I cannot say that this is the best or the ultimate Spriter extruder nozzle fan duct, but it is the apogee of my research (at the moment) and it is free to use... The categories of air duct ca be summarized in few famillies: from a single side (like the original one) from two lateral side circular The firs one is useless at high speed. The second one can work but cooling power is different between horizontal walls (X axis) and vertical walls (Y axis) because the two horns works quite well for the first but less fot the last. Printing a vase at high speed makes evident that the front side is not properly cooled, on the other side the back (where the air jet hit better the concave part, due to the path the nozzle is running on) is usually clean and well done. The circular "all open" nozzle need an in depth study because it seems to me that it could be an all aroound gogod solution but the ratio between intake (in my case 5015 fan outtake) and the exit risks to e too similar and in this way the air cant be properly accelerated (pressure and velocity of the air in a pipe are tied to the pipe section. IF you reduce the section, the air gain speed). Well I tried a compromise...a 3 jet of air at 120 degree, all around the nozzle, with a good speed, hitting the hot filament from all around with hi speed air. You need a zero Y probe mount (you can find some of them here in thingiverse), 4 M3 screw (I use 3 6 mm and a 20 mm and a M3 nut for the duct and 2 screws 6/10 mm and 2 nuts for relocating the probe) Disassemble the extruder- carriage link, dissasemble the probe, remove the plastic box of the heater block fan, substitute the carriage mount with the zero Y offset mount. remove the original fan and fan duct, assemble the new fan duct , mount the new 5015 fan in the duct (if it is hard to push in you can use a lighter to warm the petg ad make the perfect sit for the fan). You will need a new micro connector (I can't remember the name) or you can be an alpha male and cut the wires like I did... 8-) Print with PETG, 016-022 layer, 2/3 walls, a normal infill (20-25% will be ok), no support (the duct sit on the plate).
With this file you will be able to print Zad Nozzle Fan Duct mk3 v1.0 for Ender 3 S1 Pro Spriter extruder and 5015 blower fan with your 3D printer. Click on the button and save the file on your computer to work, edit or customize your design. You can also find more 3D designs for printers on Zad Nozzle Fan Duct mk3 v1.0 for Ender 3 S1 Pro Spriter extruder and 5015 blower fan.