Zaribo Z top bracers
thingiverse
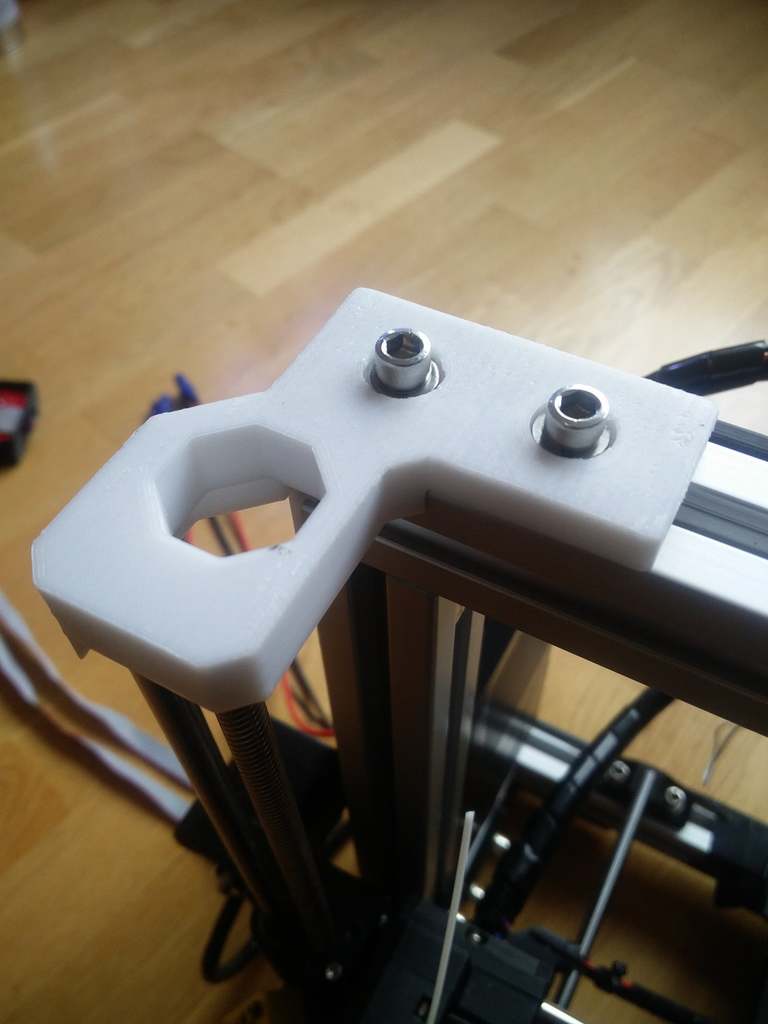
This is my version of the Z top brackets for Zaribo. Solved a few things for me. Installation is easier. You still need to slide in the nuts before hand, if you use the pre-assemble-nuts. But once that is done, you have remove these bracers easily and get the smooth rods out. On the original Zaribo version, you can't reach the screw to remove the bracers once you have assembled the printer. So maintanance is also easier on this version. More room for X-idler for improvements (the screw on the inside prevents you from changing the X_idler and X-motor parts to much. Now you have more room to play with). Extrusion cover is built in and helps with installation, if you don't have the M8-version of Zaribo. The files names "no_M8" is for Zaribo where you don't use M8 to assemble the frame, but use conceled corners instead. It is the placing of the top screws that is different. The ones for Zaribo with M8 is slightly wider, to fit the two screws properly. All these fits any kind of extrusion, not just Misumi. So don't be scared when the files are called "nonMisumi". That just means it is not adapted for Misumi, but rather to any extrusion. It will work on Misumi as well. Added step-files, so you can change them if you like. I also made them look as rigid as the rest of the frame ;) I have been using the none M8-versions for 8 weeks now. So far, they are working fine.
With this file you will be able to print Zaribo Z top bracers with your 3D printer. Click on the button and save the file on your computer to work, edit or customize your design. You can also find more 3D designs for printers on Zaribo Z top bracers.