Zero reference offset spacer for glass plate printing.
thingiverse
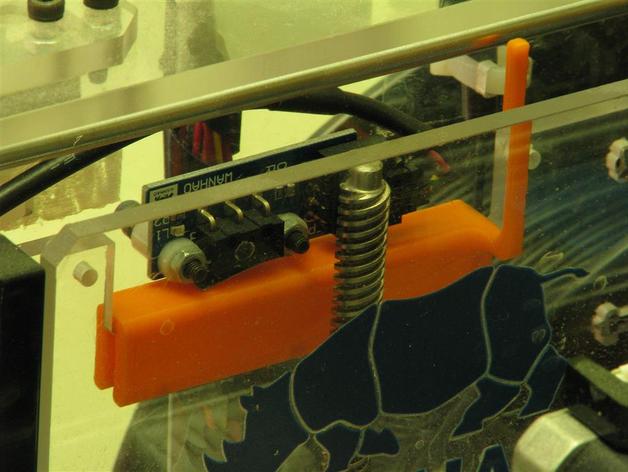
I'm just making a new beginning with glass plate printing and I quickly discovered that I had to adjust the Z axis zero point to account for the thickness of the glass, so here's a small tool to accomplish exactly that. I designed it for my Wanhao Duplicator 4 which I think has the same layout as the Makerbot, so it should work just fine on either one. Nicely colored in bright orange, so you can easily spot when it's properly in place. Instructions The spacer is designed to sit snugly on top of the 5mm thick vertical acrylic plate that activates the Z-axis zero microswitch, which trips 3mm (the thickness of the glass) sooner than it would otherwise. Once you've got your glass plate loaded, simply use the handle to carefully lower the spacer down onto the rear plate, situated right behind the Z-axis threaded rod. I printed this item with a very slow vertical print speed in order to completely eliminate the need for bridging across any gaps and also to give the handle an extra boost of strength. And what did my first print onto glass look like? It was nothing short of extremely smooth and shiny!
With this file you will be able to print Zero reference offset spacer for glass plate printing. with your 3D printer. Click on the button and save the file on your computer to work, edit or customize your design. You can also find more 3D designs for printers on Zero reference offset spacer for glass plate printing..