Zip Tie Raspberry Pi3 Case for fastener free mounting to side of Ikea Lack end table
thingiverse
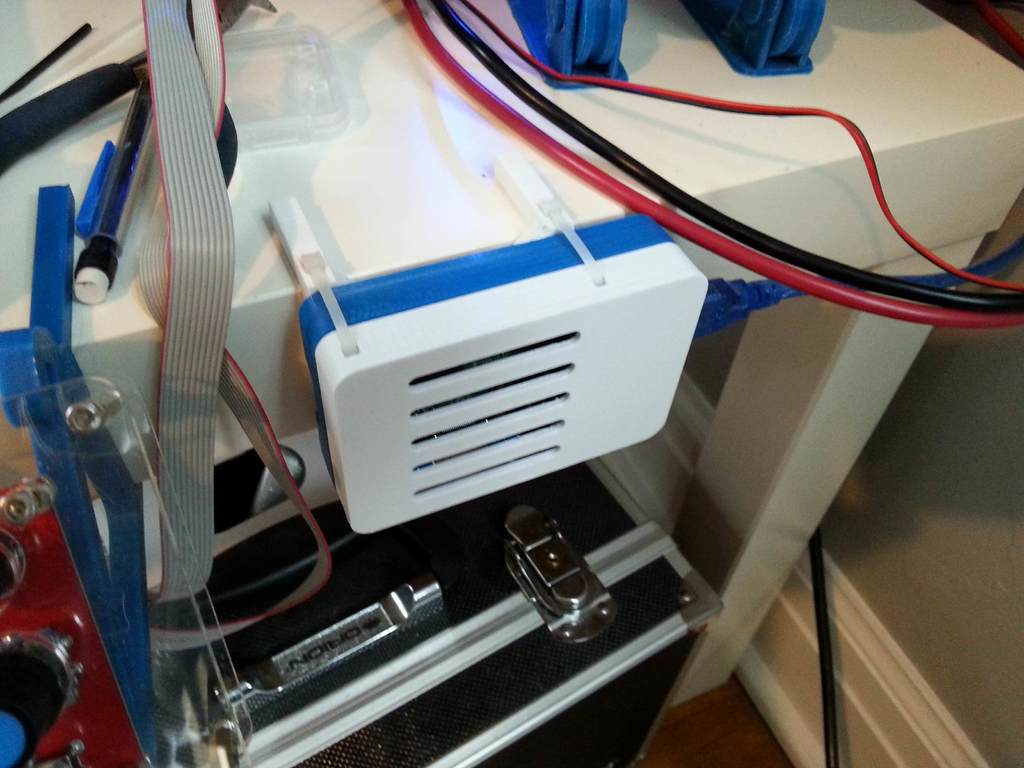
This is a Raspberry Pi 3 case designed to be assembled with Zip Ties instead of screws. The legs have pockets to fit the zip tie heads for a clean look when properly assembled (see pictures). It consists of three parts: case lid, case base, and case legs. The zip ties I used are approximately 15cm long, have a buckle roughly 4.5mm x 4.5mm, and a strap 2.5mm wide. These small zip ties are commonly known as "the little zip ties" since they are the smallest common type available. Assembly works best when done one layer at a time. Start by inserting the zip tie from the sides of the legs. When all four have been placed through the first layer, install the second and third layers. Secure the zip ties and push the heads into the recessed areas in the legs before cutting the excess strap length. Handy Tip: curl the ends of your zip ties before trying to put them through the slots. The radius of the curves is tight and it can be difficult to push the zip tie through if the end doesn't have a little curl. The legs are designed to slide onto an Ikea Lack end table, fitting snugly but easily removable. They are approximately 25mm long. You will need to rotate the lid and legs in your slicer for support-free printing. There are a few instances of bridging (the SD slot, power connector, and one on each leg), but it printed fine with no supports using the logical rotation of the parts (top of the lid and bottom of the base flat on the printer bed). The shell is 2mm thick for added sturdiness. It is a tight fit on a Raspberry Pi 3 with only about 1.5 mm of space around the PCB. You could not have a smaller or more robust case. Dedicated slots are not provided for the GPIO, camera, or screen ribbons, but the camera ribbon might be able to pass through the cooling vents on the lid (don't hold me to that). Also included are .STP files for easy remixing - if you want to add dedicated camera or screen slots, GPIO access, visible LEDs etc. I have models available for a lid using 3mm flush head screws, but 3mm screws seem to require enlarging the holes in the Pi's PCB. I can upload those if anyone wants them, but I prefer using Zip Ties and do not recommend taking a knife or drill to your Raspberry Pi's PCB. This is my first original design for 3D printing. I've only been 3D printing for about a month, so let me know if there are any problems. I'm open to requests for alterations or variants.
With this file you will be able to print Zip Tie Raspberry Pi3 Case for fastener free mounting to side of Ikea Lack end table with your 3D printer. Click on the button and save the file on your computer to work, edit or customize your design. You can also find more 3D designs for printers on Zip Tie Raspberry Pi3 Case for fastener free mounting to side of Ikea Lack end table.