Zonestar P802qr2 motor mount Z axis
thingiverse
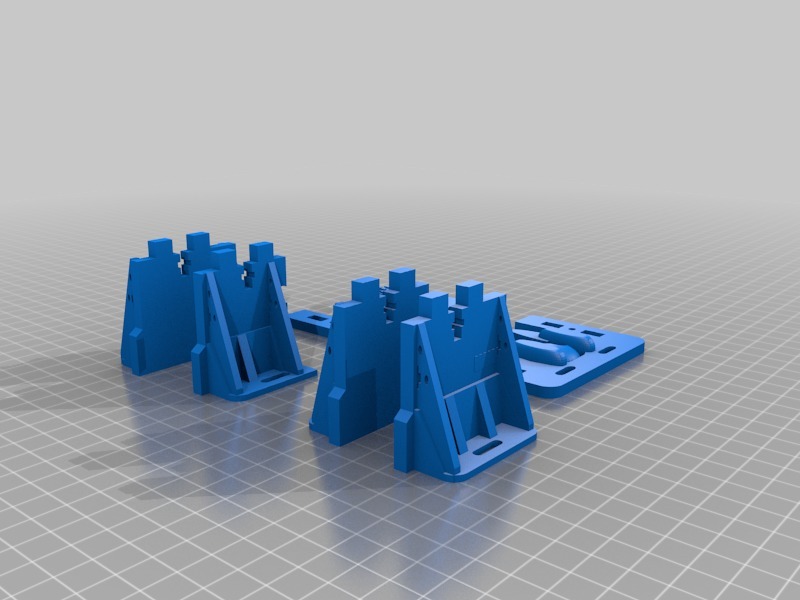
This thing was made with Tinkercad. Edit it online https://www.tinkercad.com/things/1lsOqybtPPp I took Simhopp's Replacement Motor Mount and adjusted it for Zonestar p802qr2 metal. I also took Adjustable Z-Axis Motor Mount by djnicolosi3148, and I adjusted it for Zonestar p802qr2 metal. Furthermore, I took Anet A8 motor mount fix by klownius and adjusted it for Zonestar p802qr2. A big thanks to Simhopp, djnicolosi3148, and klownius for doing this! I printed this using ABS and 40% infill .14 HOURS PRINTING TIME. Klownius took Simhopp's Replacement Motor Mount and adjusted it so that it has slotted (oval) screw holes for the four motor screws. Also, I adjusted the motor hole so that it is also slotted (oval). Each Z Axis motor can be slid to the left or right. This should straighten up those threaded rods and allow the Z carriages to slide up and down smoothly. Now, it is possible to reprint the carriages on either side so that they straighten up the Z threaded rod, too. They can still be used with this mod to tweak it just right. And replacing that fragile acrylic is always a good thing (I keep mine as spares). Klownius measured the center of the threaded rod to the center of the non-threaded rod on each side. I now have 23mm on top and bottom for both sides, so I know they are pretty parallel. (They can bear weight if tilting the printer). I pounded the top plate onto each side plate with a rubber mallet, and I screwed them together (tight parts fit = no vibration). Then, each mount box slid right into the frame, no issue, no mallet, no anything. It is an easy replacement, but it took a little bit of fiddling to get the axis perfect straight. Also, I installed a cork gasket over each motor to help with vibration. Each mount was three separate pieces (rather than one single piece), and this was done for two reasons: 1) Strength of materials - long thin layers on the side walls are more brittle than a large layered area. 2) If your Z Axis is really bad BUT at least can print under about 10mm (probably closer to 8mm), you can print this (still need good X and Y axis). Work in progress . It's on my ZONESTAR P802QR2 right now. Here is a link to the motor gaskets so that you know what I am talking about: http://www.makergeeks.com/ne17stga4pa.html The original motor mount: http://www.thingiverse.com/thing:1474131 https://www.thingiverse.com/thing:2170852 https://www.thingiverse.com/thing:1214772 https://www.thingiverse.com/thing:910140 A big thanks to Simhopp, djnicolosi3148, klownius for doing this!
With this file you will be able to print Zonestar P802qr2 motor mount Z axis with your 3D printer. Click on the button and save the file on your computer to work, edit or customize your design. You can also find more 3D designs for printers on Zonestar P802qr2 motor mount Z axis.