12 gauge exploding arrows 3d models
186999 3d models found related to 12 gauge exploding arrows.
cults3d
2020 Series Metal Corner Brackets x 12 M5x10mm Button Head Socket Cap Screw just buy the 100 pack M5 2020 Series T Nut also get the 100 pack, These simplify the assembly so much! You can easily slide fasteners in. 15 Amp 24 Volt Power Supply of Good...
prusaprinters
These were mostly aesthetic changes as we were using a qualitative eye to compare the sketch to the model.image of the two modelsMy model was very close to the original, although if I were to do this project again, I would make the length slightly...
prusaprinters
The wiring is the worst part of the build, but once done it is worth it! Print Settings Printer Brand: Prusa Rafts: No Supports: No Resolution: 0.15 Infill: 30% line for rings, 100% for connector and diffuser Filament: PLA Notes: Filament: Uniqstore...
gambody
Download a Mech Warrior 3D model that will complement your collection of Mechs.On 19.12.2016 the model files have been optimized and made solid. They now are adapted to be 3D printed using any slicing program. 3D model files are already available for...
thingiverse
😊 /******/gliedernindustrie.de P.S.12 I hope these spins meet your expectations! If you need any adjustments or if there's anything else I can help with, please don't hesitate to ask. 😊 /***/gliedernindustrie.de /***/gliedernindustrie.de...
prusaprinters
It should work with a fitting flush mounted.Bitspower Pass-Through Fitting-external port diameter 25.04mm-external threaded 19.9mm-length of external tread 12.06mmI had this in my water cooling parts. It threads into the plastic, and back piece...
thingiverse
To achieve the wow effect, you need to place an LED strip on the back of the decor. My some other things: <a title="Cap.Am. ...Wall Decor" href="https://www.thingiverse.com/thing:5195100" target="_blank"> ...
prusaprinters
language support (Hemera mod, from E3D Tuto) configuration_prusa.h Line22 : define NOZZLE_TYPE "E3D_Hemera" // Hemera // Developer flag define DEVELOPER // Printer name define CUSTOM_MENDEL_NAME "ProTubeVR Hemera MK3s" //Hemera **Line42: // Extruder...
thingiverse
To achieve the wow effect, you need to place an LED strip on the back of the decor. My some other things: <a title="Cap.Am. ...Wall Decor" href="https://www.thingiverse.com/thing:5195100" target="_blank"> ...
prusaprinters
See section 7 in the build notes for more information. 12/2/19 Added some photos of the Arduino, stepper, and rotary encoder wiring. I bent all the pins on the Nano 90 degrees, to make them easier to access them. In some cases I soldered wires with...
prusaprinters
This means using a bolt of 35 mm (M4 or M3 will do) for the pivot.By the way, to access the Dremel chuck clamp you can…A) loosen the M3 corner screw on the upper_pillar_clamp and turn the Dremel roundB) take the rubber bands off and drop the...
gambody
They now are adapted to be 3D printed using any slicing program. 3D model files are already available for purchase and download. ________________________Now, the 3D Model of Zeus MWO is available in two scale: 1/60 for Version 2 (FDM/FFF) and 1/100...
cults3d
IF YOU ARE HAPPY WITH THAT, A LITTLE DONATION WILL BE VERY NICE <3https://www.paypal.com/donate/?hosted_button_id=5F525DYM8GXK4 If you want to do a remix or changes to the design, you can get the Fusion 360 and STEP file here:...
thingiverse
Or for Vega 12Б like this one: 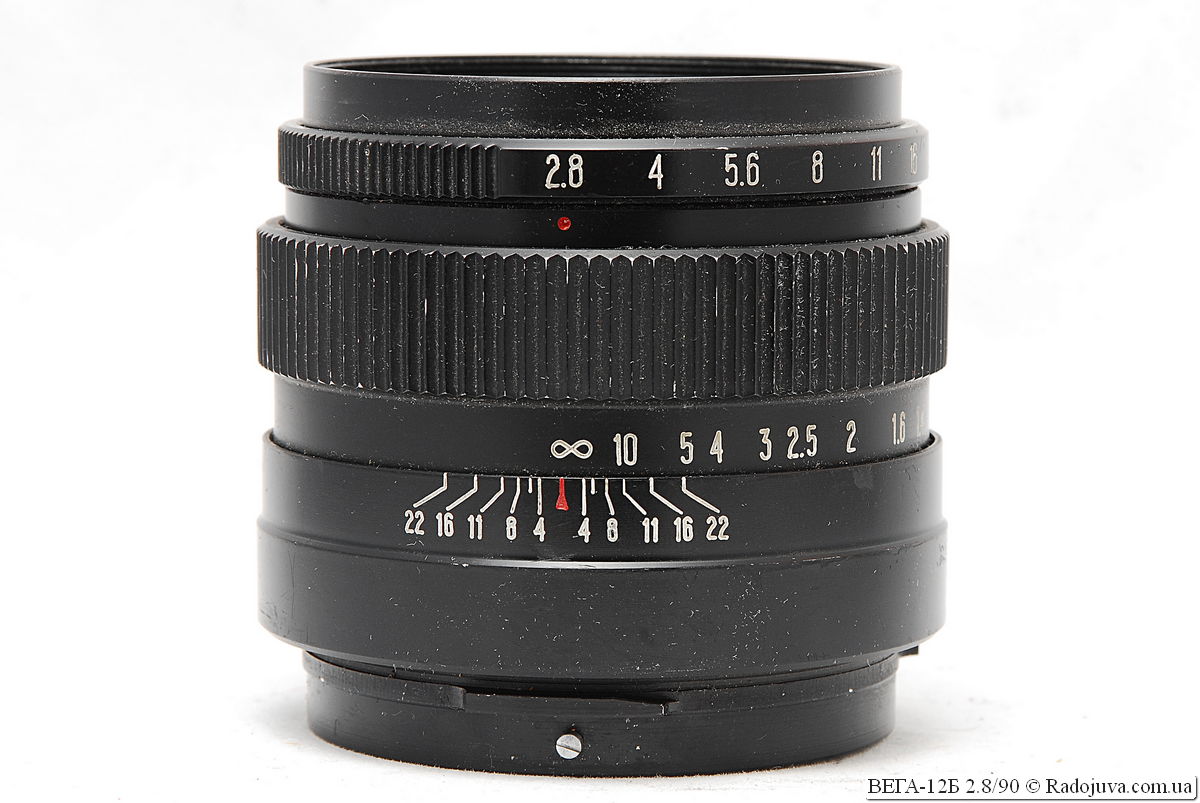 --- The major reason of modification is - to make the Pentacon Six bayonet part much hevier and stronger. Previous version -...
prusaprinters
...Press the trigger again to stop it. you can use each power supply from 12-18V. from my experience, 15V gives you the best result. But 12V is also good.</p><p> </p><p>I will add some more pictures and testings with this smoother soon.
grabcad
The easy to collapse design of this Class I Division 1 LED work light allows Larson Electronics to avoid pallet freight charges when shipping and deliver these units via UPS next day air service, which in turn improves delivery time and reduces the...
thingiverse
To achieve the wow effect, you need to place an LED strip on the back of the decor. My some other things: <a title="Cap.Am. ...Wall Decor" href="https://www.thingiverse.com/thing:5195100" target="_blank"> ...
thingiverse
To achieve the wow effect, you need to place an LED strip on the back of the decor. My some other things: <a title="Cap.Am. ...Wall Decor" href="https://www.thingiverse.com/thing:5195100" target="_blank"> ...
thingiverse
To achieve the wow effect, you need to place an LED strip on the back of the decor. My some other things: <a title="Cap.Am. ...Wall Decor" href="https://www.thingiverse.com/thing:5195100" target="_blank"> ...
thingiverse
To achieve the wow effect, you need to place an LED strip on the back of the decor. My some other things: <a title="Cap.Am. ...Wall Decor" href="https://www.thingiverse.com/thing:5195100" target="_blank"> ...
prusaprinters
12 V) and ground connectors together, as well as the PWM pin (if you want to control them). The mentioned Arctic fans do have a cable that allows you to do this without modification, for others, you may need to splice them...
thingiverse
To achieve the wow effect, you need to place an LED strip on the back of the decor. My some other things: <a title="Cap.Am. ...Wall Decor" href="https://www.thingiverse.com/thing:5195100" target="_blank"> ...
prusaprinters
Slide the plugin pieces (#7) into the base (#5) .12. If you want, fill the hollow walls with nuts or whatever you prefer.<br>13. ...Mount the baseplate (#6) to the case (#5) (4 x M3*6mm). </p><figure class="image"><img...
thingiverse
To achieve the wow effect, you need to place an LED strip on the back of the decor. My some other things: <a title="Cap.Am. ...Wall Decor" href="https://www.thingiverse.com/thing:5195100" target="_blank"> ...
cgtrader
We hope you enjoy - please let us know in case of any questions, we will be happy to help you in our friendly Discord community: https://discord.gg/mQVw8jYZeW Every asset pack includes: Unreal projects (4.24+ and 5), uncensored Unity project...
prusaprinters
Update 6/23/22Created a different lid (Lid v7.stl) and button (New_Button.stl) that is compatible the very nice TFT LCD display holder by design8studio...
thingiverse
To achieve the wow effect, you need to place an LED strip on the back of the decor. My some other things: <a title="Cap.Am. ...Wall Decor" href="https://www.thingiverse.com/thing:5195100" target="_blank"> ...
thingiverse
To achieve the wow effect, you need to place an LED strip on the back of the decor. My some other things: <a title="Cap.Am. ...Wall Decor" href="https://www.thingiverse.com/thing:5195100" target="_blank"> ...
thingiverse
12. Allow glue to cure completely for steps 8 - 11. (epoxy ~24 hours) 13. Glue all the play surface tiles to the main body. This part does require you to work quickly and accurately as the piece will slide around as the magnets with their...
thingiverse
To achieve the wow effect, you need to place an LED strip on the back of the decor. My some other things: <a title="Cap.Am. ...Wall Decor" href="https://www.thingiverse.com/thing:5195100" target="_blank"> ...