basic robot 3d models
139198 3d models found related to basic robot.
thingiverse
There's lots of info on using WLED out there, but you should be able to get it installed with the instructions here: https://kno.wled.ge/basics/getting-started/ (note: you can also use WLED to configure different functions into the micro switch...
prusaprinters
(https://www.thingiverse.com/thing:3433619) Guide First of all, you need to know the basic of VORON Afterburner. You need to download VORON 2.4+ STLs, and find X carriage parts, where original VORON Afterburner parts located. You need M3 screws in...
prusaprinters
However I'd recommend at least three perimeters for larger parts. PLA works well. You need to print things with a "_V2" at the end: 2x endBase & endStepperMount 8x bearingWashers 4x cableMgr ...and 1x of everything else with a at the end...
thingiverse
So yeah, that's a basic overview of everything I can think of at the moment regarding all this. I was wanting to fix more of the issues before publishing but it's already been like a month beyond when I was hoping to publish initially. I'll continue...
cults3d
D pad for direction control and 4 front buttons provide your basic SNES type controller setup. On the back there's two triggers and two bumpers to complete the package and make even Playstation 1 games easy to play. The D-pad Center Spire gets...
thingiverse
It can be found here: https://www.thingiverse.com/thing:16627 Some basic settings are as folows: Teeth 172 Profile 12 shaft 18.3 m3 dia 3.6 hex 4 flats 6 depth 0 retainer 1 ht 1 idler 1 ht 1 pulley t ht 7 pulley b ht 10 pulley b dia 40 nuts 4 angle...
prusaprinters
Sometimes you will see bumps when printing in PLA, and can fix this by lowering the extrusion rate; if you still get bumps, see below:If you're still getting bumps: especially if you're on a more basic machine like an Ender 3, it may be a matter of...
prusaprinters
We currently own a well-used basic version of the company's iconic red wagon that had been given to us by a co-worker (who bought it at a garage sale years before for her kids). This model caught my attention, though, because—in addition to the...
thingiverse
Step 19: We only need basic soldering skills to assemble. Step 20: Weld the negative pole of the fan and the power switch together, then weld the positive wire of the fan to the switch, and weld the remaining wire to the other end of the switch....
cults3d
Let's look at the basic schematic: Here you can see the MOSFET boards, the Pi, Voltage converter and main power relay hooked up as you would on the printer. #The pins on the Raspberry Pi as numbered based on the GPIO number which is not the pin...
thingiverse
Twelve warm white (3 mm) LEDs pseudo-randomly illuminate the white keys to a song when it is playing: VideoPrint Instructions:Resolution: 0.2 mmInfill: 100% for all parts except piano top and bottom (10%)Supports and brim: see the individual parts...
cults3d
The basic wiring has to be like this: Hints If you don't have/ don't want to use the neodymium magnets, a simple ballpoint pen spring will do. There's a blind hole for it at the bottom. Just cut it to length and pull it over the M3 x 20 screw. Make...
prusaprinters
Basically, you need to print a lamp base (a 2-material .3mf, around 24 hours), some shade lock parts (three single-color .3mf, total of 2 hours), and the shade of your choice (4 prints using 4 or 5 materials, around 3 hours per side). Please note...
thingiverse
I really suggest watching a video on this, but the basic steps are like this. 1. Make copies of each shape, and put the two copies at the same coordinates. Then set one as a hole and the other as a solid and do a union. 2. Do the same thing as...
thingiverse
I recommend any STL files you create are checked using a program like Netfabb Basic free edition. Doing a simple "Close All Holes" repair has fixed most of the issues I've run into so far. If you do run into issues with mesh quality, please let me...
thingiverse
Basically, depending on the part, I left 0.2, 0.3 or 0.6mm plays on each side of a cylindrical part to get a sleeve fit with an Ender3-type FDM printer. For example, if the diameter of a hole is 29mm, then with a 0.2mm play, the cylinder/axle...
thingiverse
I really suggest watching a video on this, but the basic steps are like this. 1. Make copies of each shape, and put the two copies at the same coordinates. Then set one as a hole and the other as a solid and do a union. 2. Do the same thing as...
thingiverse
Hope this is an item you can build for anyone you know who is in need of them with basic ready-to-print 3D printers, such as Flashforge Finder and Adventurer. Cheap, strong, and fast to build. Code will be included so the best scenario is that you...
thingiverse
Id basically be redesigning the duct part (Which would take a lot of time and I wouldn't feel comfortable unless I tested it myself, which would also take time) or poorly enlarging the slots, and I don't think that would look very good. * Does...
prusaprinters
Basically, you want the part to be solid or nearly so. Make your interior lines (skin, walls, infill) as wide as your hotend can reliably do. Since this will go in a car, do not use PLA - it won't stand the summer heat. I printed mine in PETG (Atomic...
prusaprinters
The following formula aren't exact but they should place the text in a good location close enough to where they should be:Xᵗᵉˣᵗ = -84 - (TextXsize/2)Yᵗᵉˣᵗ = -7.07 - (27.67-TextYsize)/2.66If your print won't be dual-extrusion, you can use the combined...
prusaprinters
You only need one or two of these, depending on whether you are going with a single or a double traveling object configuration.The basic model consists of the following six pieces:2 unique body halves ('Half 1' and ‘Half 2’);2 springs/flippers...
thingiverse
but do this outdoors because you are basically burning plastic and the fumes are anything but healthy, 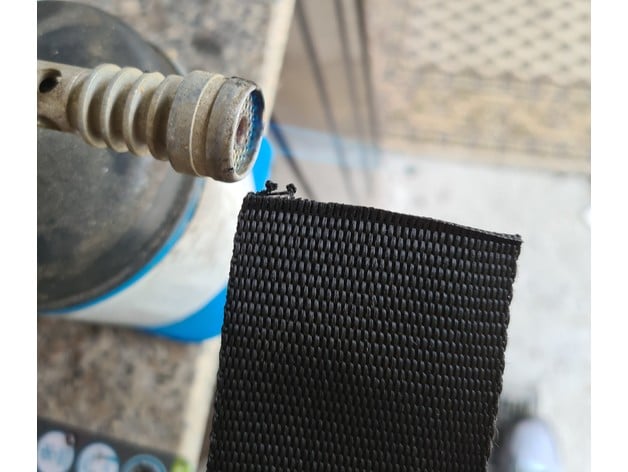 Now you can start...
prusaprinters
You basically want to set the pen to not touch at 2.5mm but touch at about 1mm. It is pretty much guess and check on a scrap piece of paper. Here is the config.ini file generated by PrusaSlicer 2.3.0-alpha2+ on 2020-12-10 at 21:34:20 UTC [print:MK3S...
grabcad
Whether in your home or office, this basic chair won't disappoint. Note: This response was created using AI, which means it is generated and may not always be perfect. Please use your own discretion while using the response. If you have any specific...
myminifactory
You can Help MyRCCar basically "spreading the word", which could mean liking, collecting, sharing, making, giving attribution, uploading your photos, testing, improving, modifying or creating new parts, but most important enjoying with it and...
prusaprinters
Plants need the night cycle to stay healthy.Your shopping list:Smart switch module:...
prusaprinters
(The last picture in the reel above is of the original desk, in which the 3D printed parts are Black PETG.)Building the DeskBill of Materials500g PETG Filament25mm Square Steel Tube 1.2mm Wall 2 x 150mm (Top a-frame...
prusaprinters
You might be able to get away with less but I didn't want to risk it.Filament: PETG or another filament that is waterproof.Supports are necessary for some parts, I was able to print the Main Basin without supports.You will need to print 3 of the Post...
prusaprinters
that's why they're slightly different from the pictures you can see above.here are the specs :5" (up to 5.5 actually) WideX and StretchX arm options6" WideX and DeadCat arm optionsHD capable with cam plates (20mm between plates)6mm thick arms (for...