ak receiver flat 3d models
161282 3d models found related to ak receiver flat.
thingiverse
The adaptor is 2" across the flats and with finger grooves to help get leverage, but then I used a strap wrench to cinch it down another couple turns. I used a wrench to tighten the garden hose onto the adaptor until I didn't want to risk any more...
thingiverse
Print with nut insert" /> Electronics Tools • Accessories Hand Tools Power Tools • Accessories <a...
thingiverse
# Step 1: Build Extruder ## What you need: - printed parts (download here from Thingiverse) - 1x base plate - 2x bearing disc - 1x clamp - 2x lever - 2x lever pin - 2x lever plate - 1x motor plate - 1x servo lever - 4x servo spacer - 2x spacer - 5x...
thingiverse
Has 3 holes where you need to install brass threaded inserts - **HeadBand.3mf** - this part is angled so that the inner spaces are flat and can be printed correctly. Notice the painted support they should be enough to print this part successfully. At...
thingiverse
So stay tuned ... Parts links below: *Belt Tensioner Aluminium NEJE 20W Laser Module DIY Kit Laser Engraver NEJE Master S2 Laser Engraver NEJE Master S2 NEJE other Laser Engraver T-Nuts M3 Bearing 693ZZ 3x8x4 *Bearing F623ZZ Screw Flat head M3x25...
prusaprinters
Rotating both KNOBS in opposite directions result in vertical motion.For more information, read Ilan Moyer in his excellent site (coreXY.com)Hoping that my Core XY system will be used for educational purpose and enthusiasm makers.WARNING:There is...
thingiverse
Links to materials: Bottle with dispenser Tweezers set Spatels om het model van de tafel te verwijderen Tang Links to used tools: Tools for machining inner holes Scalpel with flat blade Large clamp Chopper-drill Countersink Silicone...
cults3d
You can do this by gently inserting a flat head screw driver under the lip and lifting it over the small pin which keeps it in place. Do this for the other side as well and the shell should pop off. Next, remove the green trigger by prying it off...
thingiverse
This creates a blank that has a solid top that will go all the way up and end completely flat. I don't think this is actually required for bintools to keep the top of the blank open, but I did it anyway just to be sure. Also, because it made it...
thingiverse
This creates a blank that has a solid top that will go all the way up and end completely flat. I don't think this is actually required for bintools to keep the top of the blank open, but I did it anyway just to be sure. Also, because it made it just...
prusaprinters
the others are printed with their flat faces to the bed. The only part that requires a little bit of support is the Top piece for where the switch goes.</p><figure class="image image_resized" style="width:75%;"><img...
prusaprinters
The CrossBraces.STL needs to be rotated 12 degrees to lay it flat on the print surface. After printing the SideBraces STLs, but before removing them from the print surface, I laid some wide low-tac painters tape across them, to maintain their...
cults3d
It's important to be sure to sand the areas under the trucks flat and even with respect to each other, otherwise you will end up with a wobbly board. I experimented with wet-sanding using 150 followed by 220 grit, then some filler primer, followed...
prusaprinters
Because these fins are printed flat, it is stronger.3) The STL files of the top parts (not the coupler or fins) are designed for 100 mm outside diameter of the bottle. You have to scale it to your bottle diameter. so if the diameter of your bottle is...
prusaprinters
It was difficult to get the magnets to be flat rather than pivoting. Magnets would regularly fall out, etc.</p><p> </p><p>In the end I switched to securing the magnets with hot glue. The holes are slightly wider to allow the magnet to be pushed into...
prusaprinters
Removing the switch should be straight forward (a flat screwdriver helps). First insert the switch to the custom housing (once pressed into the housing it is hard to remove). Then insert the led circuit. This will be a tight fit. Use a bit force if...
prusaprinters
You just have to turn the XAC upside down, then remove the 4 rubber pads with a flat metal tool (knife, cutter, etc.). Be careful, the pads are glued with very strong double sided tape, be careful not to hurt yourself. Put the pads aside so you can...
prusaprinters
But please restrain from applying antistatic spray after drying, since it contains IPA and other chemicals and will make the PVB soft again. AssemblyWith all the parts printed, smoothed and well dried (let it sit for one more day!)...
prusaprinters
STL's should be setup so the arms print flat, which keeps the layer lines running in a way that should help reduce seperation due to vibrations and hold up to types of motion it should experience. No supports are necessary in this orientation,...
prusaprinters
All the pieces need to be printed flat, without support.To print (3D):Zoetrope-praxinoscope (or if you don’t want a praxinoscope, just the zoetrope.)There is now a narrow version of both, the slit on top are narrower;Base MBase ZConnectorManivelle...
cults3d
Micro USB Breakout Amplifier 14 x M3.12 Plastite 2 x M4x45 Screws 2 x M4 Nylock Nuts 4 x M3x14 Screws 4 x M3 Nuts Dual USB Panel Mount Single USB Panel Mount 7" Capactive Touch Screen with 1024x600 Pixels or Pi Foundation Screen 800x480px Flat Flex...
prusaprinters
A 1/8" flat-head screwdriver works to scrape out any debris from the hexagonal hole, while a #0 Phillips screwdriver works well to ream out the round hole for the screw shaft.It also helps to use the machine screw itself to clean out its hole. Insert...
thingiverse
Unlike the HF door, this doesn't have a flat bottom for media to accumulate on, resulting in better media feeding.The only additional components required are (2) 1" PVC tees, a 1" #8 machine screw, two #6 washers, and a #8 Nylock nut. Although #8...
prusaprinters
This can be applied with a thin, fine brush, or a sharp, pointed awl, or even the tip of an Exacto blade to simulate rust streaks where water would naturally run and pool over the model, such as screw slots, rims, joints and junctions, etc.Once you...
thingiverse
• 4 pcs AA battery, 1.5V • 2 pcs ballpoint pen spring • 2 pcs flat head metal push pin • 15 cm wire • lots of coin • super glue **Postscript** I have had the clock with the self climbing weight for about ten days. My ball chain was 3 meters long,...
prusaprinters
Using a flat blunt tool that will fit in the slot press down angled toward the front and the top of the panel will pop out.-- To remove the lower part of the front panel there are two small tabs that need to be popped out of the case. To do this,...
prusaprinters
I then also used my soldering iron to make it even stronger (that's why the seams are flat in the picture below). But the soldering iron part is not needed at all as it turned out in test i made later. The 3D pen makes it quite strong already (it...
thingiverse
If there’s a flat-ish STL model that you like, you can load both this and that stl into Cura, scale and move them around as needed, and slice: Cura automatically joins models where they overlap. There’s also an insert plate that fits inside style0,...
thingiverse
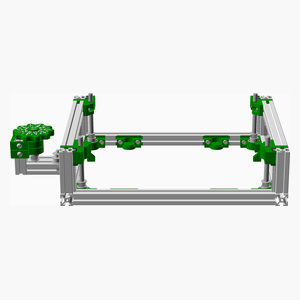 [Top](#TOP) --- ## DIYLB Beams To Bed Assembly ### Vitamins |Qty|Description| |---:|:----------|...
thingiverse
Something like a [3/4" X 1" ALUMINUM 6061 FLAT BAR 12" long .750 Solid Mill Stock](https://www.amazon.com/Pieces-ALUMINUM-6061-Solid-Stock/dp/B01F80WQ08) from Amazon would works well. I have used cheap Chinese aluminum off of Amazon; 1x.75” bar...