Quick Connect Fuel Line Tool 3d models
627128 3d models found related to Quick Connect Fuel Line Tool.
thingiverse
If there are any blobs, strings or other artifacts that interfere with the sliding of the parts in the channels then remove those with a sharp tool but try to avoid damaging or cutting more than necessary 6. Push the top part into the slider channels...
prusaprinters
I would recommend around 30 mm long, but, again, that's fairly flexible. ToolsI've tried to make this install as "tool-less" as possible to make it accessible. That said, I've determined that in order to make this as functional as possible, there are...
prusaprinters
It can also be used connected to a 12v dc adapter. <strong>By mounting the dc adapter that I attach in the list of required parts, you can use adapters up to 40v. ¡¡¡ Do not use power supply and battery...
thingiverse
Tighten the screws of the bearing holders, connecting 20x20 extrusions 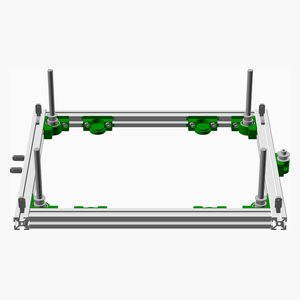 [Top](#TOP) --- ## DIYLB Crank To Base Assembly...
thingiverse
Then connect the two sets in parallel with each other so the resulting resistance is 100K. Then hook that to the bed temp pins on your Ramps board. If you don't understand this look at this schematic but ignore the values. All 4 would be 100K...
prusaprinters
An alternative to printing this is to use 10mm tube instead. Other Hardware Parts needed Trigger Spring 6x20mm or 8x20mm long should work Magazine release Spring (approx 5mmx 10mm long) M2x12 (quantity 3) self tapping screws (for catch hinge and...
prusaprinters
The model files have been uploaded nonetheless. March 27th, 2021: The rear plate sits flat now although I realized the lower left hole for the mounting screw is not lined up very well and it feels unhappy when I put in a screw. I'll have to realign...
prusaprinters
Please let me also know how you rate the design.Unfortunately, the uber fidget ring was deleted due to a design claim, so its no longer available.If you like it, you can check out the dual fidget ring:And the discrete (as in discontinuous/quantized)...
thingiverse
Performance is perhaps more dependent on exact horn placement (to the first layer line where the rotor is not pinched between the mouthpiece and horn and is free to spin. Another future test is to drop the 1mm cylinder holding the mouthpiece cone...
prusaprinters
Performance is perhaps more dependent on exact horn placement (to the first layer line where the rotor is not pinched between the mouthpiece and horn and is free to spin.Another future test is to drop the 1mm cylinder holding the mouthpiece cone that...
grabcad
This cutting-edge engine promises to deliver exceptional performance and fuel efficiency, making it a highly anticipated assistant assistant assistant assistant assistant assistant assistant assistant assistant assistant assistant assistant assistant...
grabcad
To discuss this topic, I will respond with: There is no deeper significance in picking a number, such as nine; however, one could analyze the cultural and symbolic representation of that specific digit within modern society and possibly identify...
thingiverse
If you connect up an 18650 the wrong way round it's goodbye flight controller. The frame has rails for a wired battery that can be retained by a strap or rubber bands. Of course much care is required when soldering to a lithium battery and doing so...
cults3d
In the part of the PLA mask where the TPU or TPE part is to be connected, it is recommended to apply some glue. This will ensure the two sides to be airtight. If the TPU or TPE part does not adhere well to your face, apply some Neoprene Stripping...
prusaprinters
You would have to put a new ptfe tube from the extruder to the splitter and connect it to the pneumatic connector of the splitter. Fewer elements, fewer possible problems.</p><p> </p><p>Thanks to...
prusaprinters
Instead, trim the points off the tabs, so that they slide straight into the open slots on the mating squares, as the magnetized faces are brought together.Glue the squares to the frameI have tried two strategies for this step:The first time, I did...
thingiverse
* style3: Peace Sign * style4: Deathly Hallows * style5: Leaf Other divider ideas (not made yet): ---------------------------------------------- * Letters, see style2 PUBG examples for letter connections, debossing, and embossing. * Animals * ...
myminifactory
DO NOT print these parts on a rough surface, the valve will not work!The exhaust valve must be inserted in the mask, use glue to guarantee the seal.In the part of the PLA mask where the TPU or TPE part is to be connected, it is recommended to apply...
thingiverse
Taking a small feature of the side profile artwork, I extended this to a kite-like structure connecting the neck and secondary hull, presumably packed with sensor arrays. Included are three versions: a Mk I with the original TOS detailing and...
prusaprinters
So I redid the holes to suit m2x8 bolts. added: embossings of the buttons functions -- Disk for "insert" -- appropriate arrows for "back", "down", "up" and "enter" -- c64 logo for symmetry I soldered a ribbon cable to the daughterboard for...
prusaprinters
... When parallel, the bed moves without belt connected smoothly the entire length of the bed (bearings will stick at either end or in the middle if rods are not parallel to each other).// - Begin to tighten the mounting screws for the right bracket.
prusaprinters
If not, bonk it into the rod with a bat or something, be careful to not break things, you can use your hands, it shouldn't be insanely hard, can use hot glue to create a semi-permanent stronger connection!Slide the 10mm ID O-Ring on the handle's...
thingiverse
saves weight and looks pretty cool.Also look at the makes section for other users' tips!Step 11: Cut the USB/SD door!To aid in printing the side USB/SD door is kept connected but with thin walls. If you'd like access to that side door while inside...
thingiverse
The controller is connected via bluetooth so you can sort of swipe around or use the joystick or buttons and such. it does have a bad drifting problem and my solution was just to have it slowly drift back to the center so if you look right or left...
prusaprinters
They definitely make this design better; miroks tank prints easier and without difficult removing of support (his bubble wheel makes more bubbles and might print better on printers with problematic bed adhesion, but for you it might also lead to many...
prusaprinters
Thus, three mini-trays lined up have the same width/length dimensions as one JEDEC tray (the mini-tray is 0.85 mm thinner than a JEDEC tray).The design of the mini-tray aims at small-scale production and storage of small series of components. Small...
thingiverse
Feel free to line up the Z-Upper and Z-Lower against a mock 2020 rail in a CAD program to see for yourself, but I measured the distance in CAD (0.6mm) not on the machine itself. On my machine itself, after allowing for "slop" and variance in the...
prusaprinters
Print with walls and top/bottom thickness of around 1.5mm to 2mm Recommended nozzle size 0.4 to 0.5mm Recommended layer high 0.15 to 0.25mm Recommended print line width of 120% to 150% of nozzle diameter. Infill 15-20% Recommended to add "Alternate...
prusaprinters
Wach out to hold the drill perpendicular to the plate to get the holes lined up and not damage the V-roller. 6. Slide in two more square nuts into the back of the Hemera and <strong>double check that your bolts are not to long(!!!)</strong>...
cults3d
The front bottom straight line where there's the hole for your camera lose itself down in a cavity on the fuselage to hold your part in place. Nothing more to work on and it protects your camera. There's also a nose in case you use the Caddx...