anet a8 schematic 3d models
26191 3d models found related to anet a8 schematic.
cults3d
These 25mm screws are what Anet should have provided in the 1st place for proper pulley, rods and belt alignment. See image #3. Using the gauge the easy way. Updated 08/23/2018: Put the extruder in the Home position. Turn printer off and center the...
thingiverse
Since I have a textured print bed this fits perfectly together 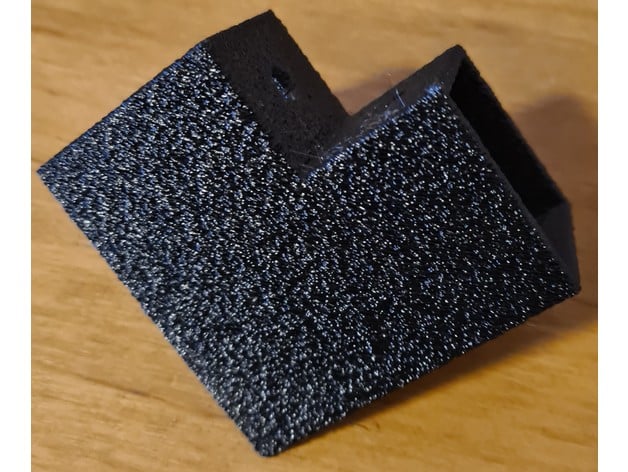 After all parts are printed and the wood is cut to length and...
thingiverse
There is a schematic image included, but it depicts both parts top-side up so you'll need to adjust accordingly. Before doing any wiring first test fit the radio module, nano, and led ring into the base and get familiar with it. The base has wire...
cults3d
There is a schematic image included, but it depicts both parts top-side up so you'll need to adjust accordingly. Before doing any wiring first test fit the radio module, nano, and led ring into the base and get familiar with it. The base has wire...
prusaprinters
The screws of the top matrix are switched 180° to avoid electric shorts between the TOP, FRONT and BACK matrix! Code:The code can be found on my GitHub repository. ⚠ Important notes: ⚠ The provided code limits the amount of...
myminifactory
For the wiring, look for schematics.pdf Here is the arduino code: /* Jacques favre:drive 2 stepper motors to power a clock using a RTC for acuracy2 buttons to adjust time1 button: move secondsother button: move hours and minutes2 buttons: move...
thingiverse
Literatur: -Filtering routine (does not work ok) https://tttapa.github.io/Arduino-Filters/Doxygen/d3/dbe/1_8FilteredAnalog_8ino-example.html -Precise mearuring using external reference sources...
thingiverse
See the schematic, below, and the BISS0001 datasheet for details.On timeThe length of time that the output is on after being triggered is set by C1 and R2. The on time (in seconds) is roughly 24576 × R2 × C1. The default is about 30 seconds. To...
prusaprinters
Turn off the power and disconnect the power supply after the output voltage is set to around 5V.Add 2 red and 3 black wires to the output +/- contacts of the “DC-DC step down board”.One pair of red/black wires need to be connected to the “ESP” to the...
thingiverse
I initially hooked it up behind the one switch but there are times i want the lights on when the heater is not so I decided to add this feature Edit 1/8/2022: I've added wiring schematics and pictures of my final product. So this has been a long...
prusaprinters
You can see the texture in good lighting in one of the pictures on the floor. Electronics Connect all the parts as in the schematic picture. The battery slots have a 2perimeter (@ 0.4mm) arc that serves as a spring. It does have 2 holes to thread...
prusaprinters
Refer to the schematic in the pictures. X carriageOn the original build the laser driver was fastened with regular M3 hex nuts you placed into the X carriage. I found this quite frustrating at time since they move around and potentially twist. In the...
thingiverse
I don't have exact wiring schematics, but I will explain what ever part does and how they interact with each other. First, you should start by wiring the three 18650 batteries into a pack. Use the female T-plug and male 3S JST connector for this. Now...
prusaprinters
But it's well designed based on real dimensions of the parts used in the projects for maximum compatibility. Hardware requirements: Wemos D1 Mini v3 (https://www.aliexpress.com/item/32529101036.html). WS2812B 32led Ring...
prusaprinters
Refer to the schematic for more information. 11/16/19 Changed screw lengths to minimize stripping screws. Posted new zip file (Thingiverse files 110519.zip) that includes updates to the following STL files: L2 Lower Body L2 Lower Body Trellis2 Base...
prusaprinters
I originally intended to use the coupler directly on the servo but I didn't quite work, it's much better to use the provided adapter which has teeth to match the servo's gear teeth.I taped the LED and LDR to the lid with duct tape and did the wiring...
cults3d
#Note on Anet screens: They will not work with this board. Anet screens are not wired to the regular standard and are 5v. These use 3.3v logic. Use a 12864 or 2004 RepRap type screen. That said, Let's dive in! #Requirements SKR 1.3 Board ...
prusaprinters
Features:Easy to customizeChange the sizesMultiple frame optionsChange the iconUse text instead of a code (useful for double sided prints)Multi-color export (layer-change or inlay)Notes:I've also included the heart cutout template if you just want to...
prusaprinters
Add the layer and perimeters option, and modify it to 4 or 5 perimeters.Example of perimeters around the push fitting hole.Add heat to the threaded Insert with a soldering iron for the backplate and enclosure.The backplate uses the 1/4 thread insert...
thingiverse
I've had great success with the overhead filament system for my A8 so I wanted to develop something for the TRONXY along those lines. I decided to try and incorporate a previous four-spool drybox/dispenser into the design. It can weigh almost...
thingiverse
... subject imaginable; it just requires some imagination and creativity. Robots include every subject; just Google search robots and your subject, and you could be surprised. Q8: Will more be posted? A8: No, this is a functional robot. ... Figure 1
prusaprinters
... on Blender. I had also added cutouts for per-key rgb, but in the end I gave up the idea of hand wiring the LEDs. At least in this version which, for me, has been an insightful experience.Some Photographs Category: Computer
thingiverse
Feel free to write me your wishes or suggestions on https://www.instagram.com/druckdrei/ to improve your coffee budget.CAD:FreeCAD 0.20Printer:Creality Ender 3 V2Rafts:NoSupports:NoResolution & Nozzle:0.1 mm & 0,4 mmInfill:50%Filament brand &...
thingiverse
Components: Screws & Nuts: M2 screw set Motors: Racestar - 1104 7000KV Props: Gemfan flash - 2540 - triblade ESC: Racestar 4 in 1 12A using DSHOT 600 Flightcontroller: MAMBA-F405-MINI-MK2-F4 Battery - Lipo 2S 2S Lipo 60C -------------------- FPV...
prusaprinters
That means it can fly with any 18mm motor from A8 to C6. I really suggest using an A motor for the first flights. It can go out of sight easily. Rocksim says a C6-5 will take it to 1500 feet. Any wind at that altitude and your rocket is gone...
thingiverse
Feel free to write me your wishes or suggestions on https://www.instagram.com/druckdrei/ to improve the coffee fund.CAD:FreeCAD 0.20Printer:Creality Ender 3 V2Rafts:NoSupports:NoResolution & Nozzle:0.1 mm & 0,4 mmInfill:50%Filament brand &...
thingiverse
Content of Directory.txt: IRBlockingSensorMount - A mount for ir pair sensor like this: https://img.ruten.com.tw/s2/5/a8/fc/22010319138044_696.jpg (Retrieved 20200923) FlappingCardboard - Cranking flapping mechanism mount constructed using...
prusaprinters
Pay attention to which side the puzzle is on the pictures (screws to see or not, middle part rotated or not) This is the next important step:Insert the two balls as shown, then turn the middle part and push the balls into the...
prusaprinters
... Saved the solid rack as a print package option instead of a separate part. Added a 220mm rack for those using 360 enabled servos that can be cut to size (for this length carbon tube reinforcement is necessary imo)Post-PrintingCategory: Robotics
thingiverse
That means it can fly with any 18mm motor from A8 to C6. I really suggest using an A motor for the first flights. It can go out of sight easily. Rocksim says a C6-5 will take it to 1500 feet. Any wind at that altitude and your rocket is gone girl. ...